Search Knowledge Base by Keyword
Stripe
The Stripe Connector allows you to enable payment processing in a Designer application through Stripe. Note that you must have a Stripe account to use this Connector.
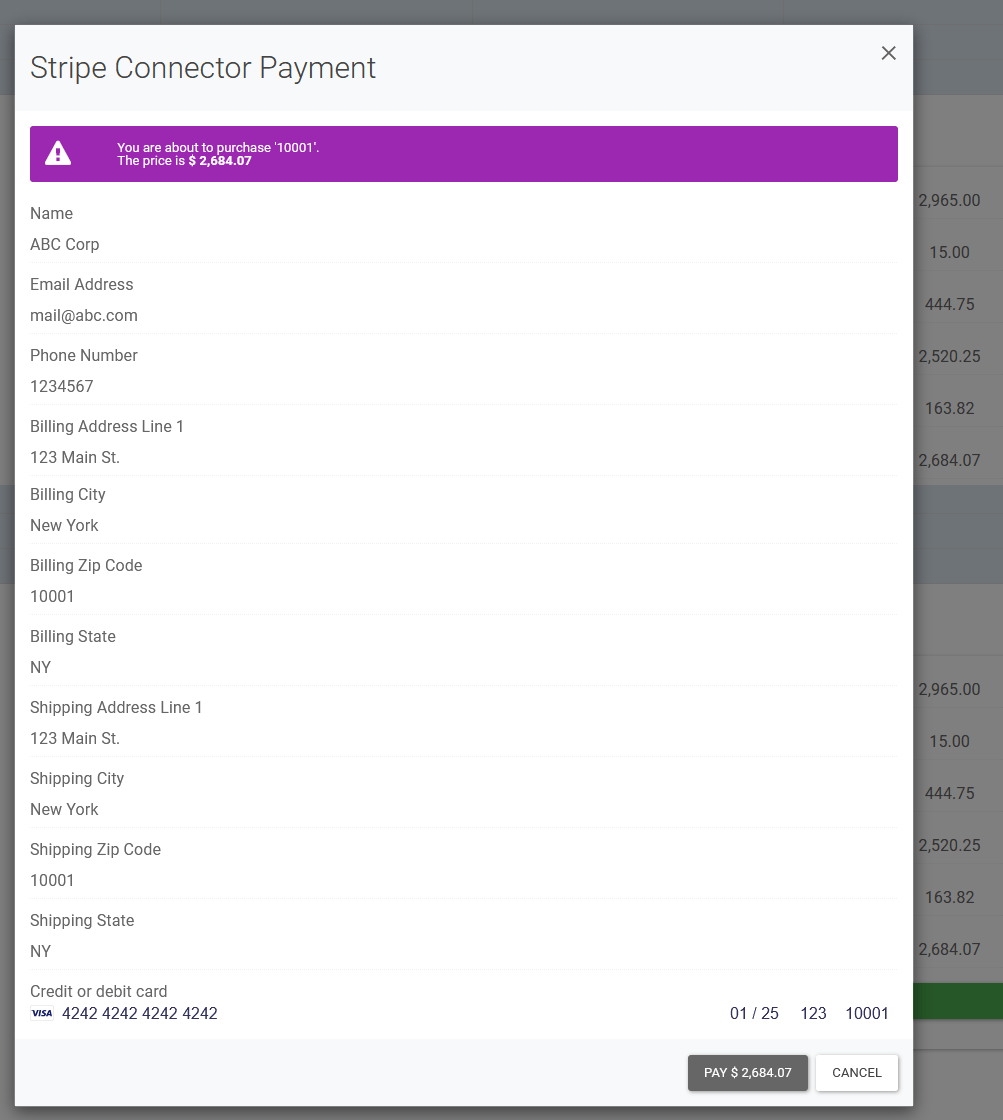
Note that adding the Stripe Connector to Events will also add a Save event since this functionality is designed to operate in conjunction with the Save functionality. When the Action Button with Stripe Connector Event is pressed in a published application, it will invoke a Payment Form that allows you to collect a set of data from the user, including the credit card information, billing and shipping addresses, and description. The set of entered data is entirely configurable from the Connector properties.
Let’s see how this Connector works on an invoicing application. Customers or sales representatives can use this application to enter a group of items and generate an invoice. Using the Stripe Connector, payments can be collected directly through this web application.

To add a Stripe Connector, begin by clicking Add Connector under the Connectors menu in the Designer Interface.

Name is simply a friendly identifier provided to the connector to help you subsequently identify this instance from other events.

Live Mode enables the real payment service meant for production usage of the application (e.g. when it is available for actual application users). Once the connector is set to the Live Mode, all payments will create real charges based on the information entered on the payment form in the published version of the Designer application.
Test Mode is meant only for testing purposes and does not result in any actual charges. This mode reflects Stripe’s Test Mode described here. Once the connector is set to the Test Mode, all sample payments will need to be performed using credit card information that is dedicated for testing. These are also defined in the link above. You can use this mode to test the functionality of your Designer application before making it available to other users.
When you’re done, click Authorize or Create Connector. This will redirect you to Stripe to authenticate your account and allow access to your SpreadsheetWeb application.

Once your Stripe account is authenticated and SpreadsheetWeb application is given authorization, you will be redirected back to SpreadsheetWeb. You can now configure the Connector properties by selecting a Currency type from the dropdown and pressing Update Currency. Please note that some currencies are not supported by American Express. If you have selected one of these currencies, you will see a warning message.
Stripe fields such as Billing Address or Payment Amount can be mapped to the SpreadsheetWeb application fields by selecting From Named Range for the Entry Mode and then selecting the corresponding field from the Named Range field.

There is a set of extra fields (identified by a Property Name) which can be added to the Payment Form. Two of these include special rules and are always required from an associated named range: Amount and Description. You must assign name ranges to both of these; otherwise, you won’t be able to Preview or Publish your application due to Designer validation failures.
All other fields are optional, except for a special case when you set Entry Mode to other than None for any of the Shipping fields. In this case, the Name and Shipping Address Line 1 will become required – you will see this reflected in the grid as a cell with a red background. The background color will be removed once a proper value is entered.
The Entry Mode is a dropdown which offers the following values:
- None – The corresponding field will not be available on the Payment Form.
- User Entered – The corresponding field will be available on the Payment Form as a textbox input that will allow the user to enter the information. This will not be bound to a named range and the value will only be sent to the Stripe system for retention.
- From Named Range – The corresponding field be available on the Payment Form as a disabled textbox control. The value in the input will be pulled from the corresponding named range. These values are bound to named ranges and can be the result of calculations or user entry elsewhere in the application. Since they are bound to named ranges, they can be used in conjunction with any other features that allow binding to those ranges.
The cells in the Named Range column are available for entry only when the Entry Mode is set to From Named Range. In this case, you can assign a single named range to the field identified by the Property Name. The value of this Stripe input will be pulled from the named range at runtime. They can be editable through inputs in the user interface or can be calculated values from the workbook, but they will not be editable from the Payment Form itself.
Required column is for entry only when the Entry Mode is set to a value other than None. Select this checkbox if you want to prevent the corresponding field from being left empty on the Payment Form. If the value is being pulled from a named range, then this effectively requires the named range itself to be non-null. In this case, this will not be rectified from the Payment Form itself, but from other inputs in the application’s user interface.
The Stripe Connector Output section is for binding some of the output data from Stripe to given named ranges in order to make these available to the spreadsheet file. Currently only Payment ID is available as output selection. Once the payment is completed successfully through Stripe’s online service, a special identifier is pulled that uniquely identifies that payment. Assigning a named range to the Committed Payment Id will allow you to use it throughout your spreadsheet file and Designer application.
Once a user fills out their order details, they can subsequently use the Action Button (Pay) in order to create a charge against the provided card information. Credit card information is confidential and sent in a safe manner to Stripe’s online platform, where the user entries are validated and payment is handled.
After the credit card is successfully charged on Stripe, the Designer application saves the record in the local database, along with the payment identifier (Charge Id, if selected). Note that the credit card information entered never touches the SpreadsheetWeb server – the sensitive contents are only part of the interaction with the Stripe service. You will be able to access the payment details from the Payments page on Stripe.

See the video below for a step-by-step walkthrough.