Search Knowledge Base by Keyword
Email Process
SpreadsheetWEB allows setting up email triggers in designer applications, which can be very useful in notifying users when certain events occur. Email notifications must be tied to an Action button, and when the button is pressed, the email process will run and send out predetermined emails to selected users.
We’re going to be using a homeowner’s insurance tool to demonstrate this feature. This application generates a premium on the final page, based on real estate properties entered by the user.

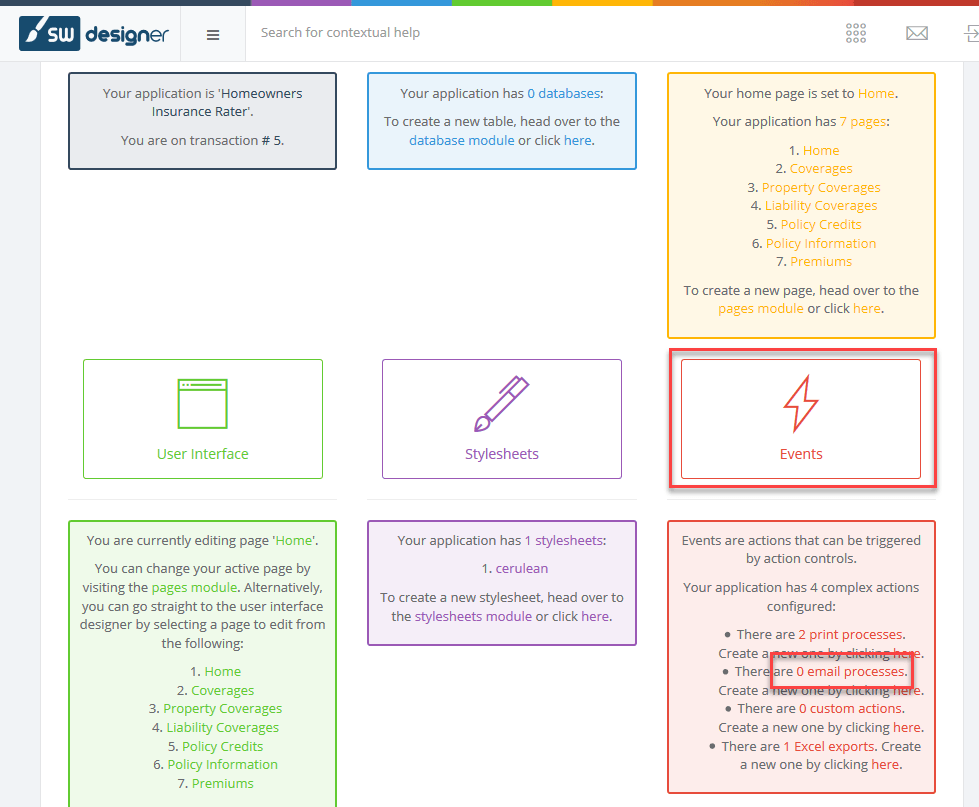
To setup email notifications, go to the designer interface and click Events to go to the Events page, and go to the Email Processes section. Alternatively, you can click the 0 email processes button to directly go to the corresponding page.
All active email processes will be listed on this page. Click Add Email Process to create a new email notification process.

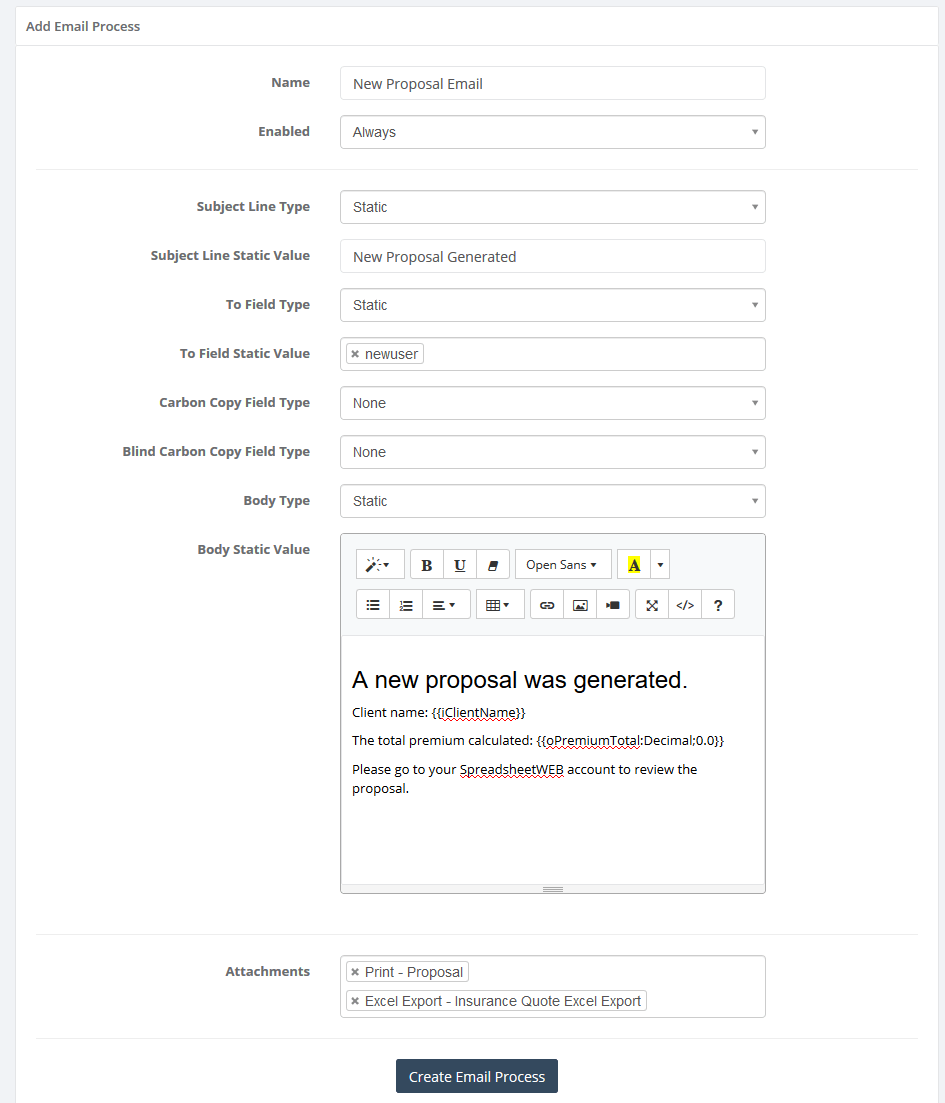
Here, you can setup the email details, recipients, and content. The Name field is a friendly name which will help you identify this process in the user interface designer, and will not be visible to the end users. In this example, we’ve used a static Subject Line Type and entered a string to be included in the subject line of every email sent. The recipient of the email is determined by the To Field Type and subsequently, the To Field Static Value. You can type in an email address, refer to a named range in the excel workbook to generate recipients using Excel formulas, or select from existing system users. In our scenario, the “newuser” is the underwriter responsible with approving new proposals. Our process will send all emails to the “newuser”, when it’s triggered.
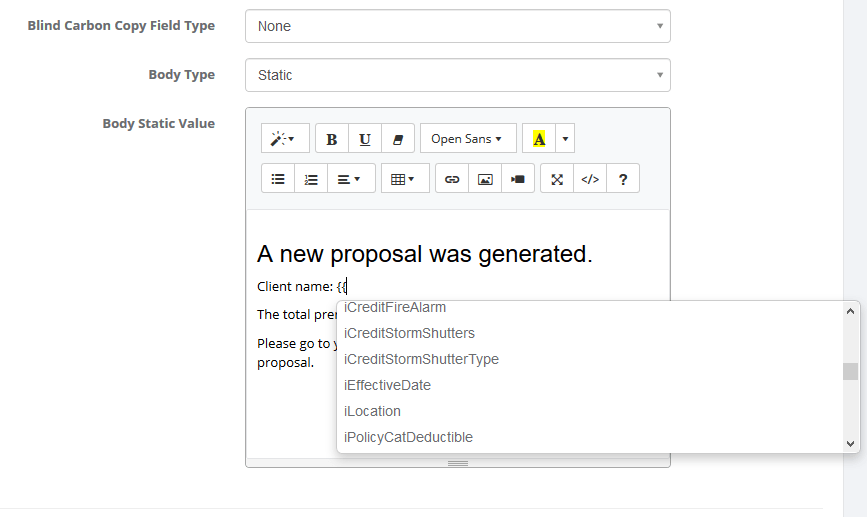
Selecting Static for the Body Type will allow you to use the rich text editor to setup the email contents. You can use application data fields by placing them in double curly braces ({{ }}). When you start typing in the two opening double curly braces, the system will display all available data fields in a dropdown. After selecting a data field, you can enter a colon ( : ) and select a data mask option, and also follow up with a decimal ( ; ) to set a formatting for numeric fields.
Any number of Print, Excel Export processes and File Upload inputs can be included in the attachment fields by selecting them in the last field. Here, we chose to include one PDF and one Excel document.
Press Create Email Process when you’re done. The new email process will be added into the Email Process Designer page. You can remove an email notification by hovering your mouse over it, and clicking Delete. We now need to assign this email notification to an Action button in the user interface designer. In our example, we want to send out the email when a user reaches the last page, and presses the Submit button. To do this, we need to go to the corresponding page in the user interface designer, and select the button. When the button is selected, the right-hand menu will be displayed and here, you can select the email process from under the Events section.

Remember to press the Submit button to save your changes to the Action button. Now, when a user submits data into the system, a notification email with the record details and two attachments will be sent to the predetermined user.
