Search Knowledge Base by Keyword
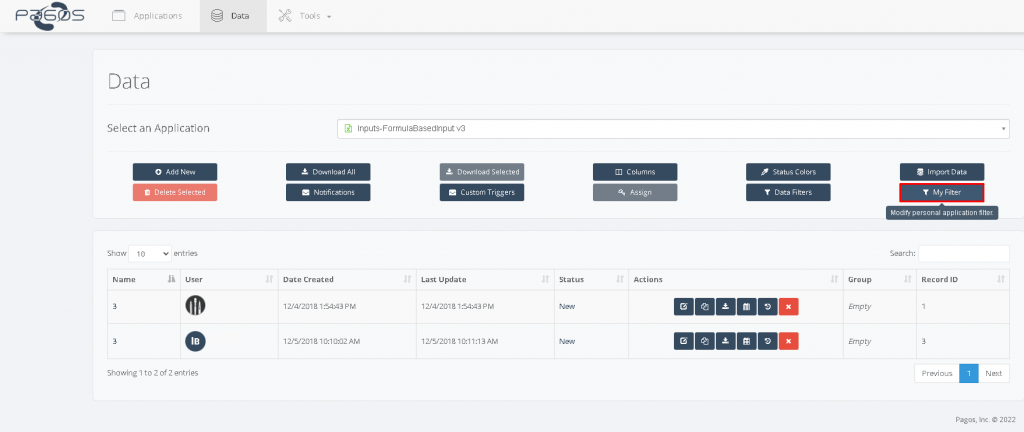
Data Filters and My Filter
Data Filters
You can set predefined filters for any web application to filter down the records displayed on the Data page. These settings will not affect any existing records or the data saved in them. This feature only narrows down which active records will be shown to the user and should not be used to limit user access to records.
All active filters for a given web application will be shown on the Data Filters page. This table will also show any My Filters set by individual users. To create a new filter with a set of rules, press Add Data Filter.

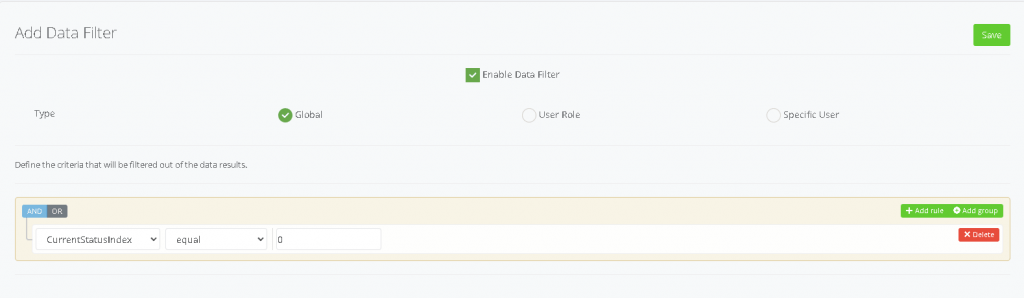
Data filters can be set on Global, User Role, or Specific User level. The scope of the filter is selected under the Type option.
- Global – Applies filter selections to all users in the system.
- User Role – Applies filter selections to all users that have the selected User Role.
- Specific User – Applies filter selections only to the specified user.
Enable Data Filter option will determine whether the filter settings will remain active. To disable a filtering rule but keep it in your list, you can use this option to temporarily disable it.

Once you select whom the filter will apply to, you can setup the filtering criteria. The dropdown menu on the left contains all database columns including data fields coming from the application and system fields. Once you select a data field, you will get additional options to setup a logic check. These options will vary based on the Data Type of the selected column. For instance, DateTime fields will have options like older than (days) and newer than (days), while string data will have options like begins with or ends with.

Some of these criteria will also provide an input field next to it to enter the desired value. For example, selecting a string data and begins with criteria will allow you to enter the lookup text to be used for filtering. You can also use System Fields in the same fashion. Below is an example with an application consisting of 5 active records.

This application consists of records that have New, Approved, Rejected, Payment Successful, or Payment Canceled status. To display only the records that have New status, select CurrentStatusIndex from the dropdown. Then, set the criteria to equal and enter the index number for this status in the box that appears. In this case, the index number of the selected status is “0” because it’s the first one in the list of Status Colors configuration.

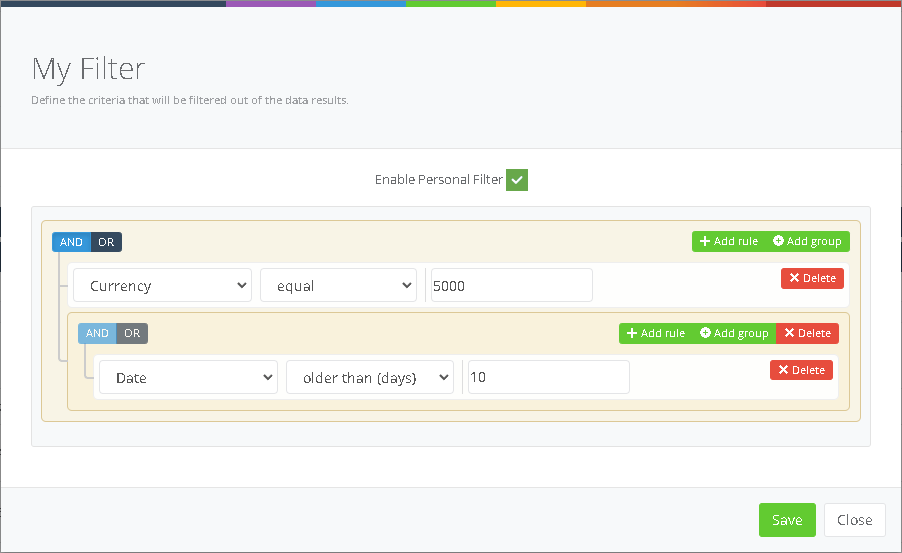
Add Rule button will add a new criteria rule into this filter at the same level as the current one. the AND | OR selection on the top left corner will be grayed out until you add a new rule. Once you do so, this option will be unlocked and you can set a logic gate for the set of criteria. If you switch this button to AND, the system will look into all criteria that comes after, and will only show the records that meet those requirements. If the button is switched to OR, the system will display the records that meet any criteria that follows. Below is an example.
Notice that the logic switch is at AND. This filter will look at two things: 1. Current Status is 0 (New). 2. Quote number begins with “10”. Only the records that match BOTH of these requirements will be displayed on the Data page. This will apply to ALL users, because the Type is set to Global. Applying this filter to the example above will yield 4 results, all with a quote number that begins with 10 and have status “New”.
Add Group option will add a subsection with another AND | OR selection. This essentially means that the filter can be setup in a way that some criteria will have sub-criteria with added requirements. You can think of this as a tree structure.The example below will look at three things: 1. Current Status is 1 (New). 2. Quote number begins with “10”. 3. Name insured contains “Restaurant” OR “Bookstore”.
ALL 3 conditions must be true for a record to be displayed. This gives us 2 records: Green Tea Chinese Restaurant and Zetlin Bookstore.
Pressing Save will add this filter to the list of Data Filters. Since this was set on a Global level, these options will apply to all users in the system.
You can edit existing filters by pressing the Edit icon ![]() or delete them by pressing the delete button next to it
or delete them by pressing the delete button next to it ![]() .
.
My Filter
My Filter is essentially Data Filters at a personal level. You can create a set of criteria to filter down the results of the Data page. Please note that My Filter ALWAYS supersedes any filter applied by Data Filters. This means that activating My Filter will ignore any settings applied by Data Filters, until My Filter is disabled. My Filter option can be enabled or disabled from the Enable Personal Filter setting without removing the filter criteria. The criteria setup works exactly the same way as Data Filters, but options will only apply to the user adding them. For more details about criteria logic, see Data Filters above.