Search Knowledge Base by Keyword
Queries
In the Queries module you can create database queries to retrieve data from applications and data maps. Queries are created using an intuitive user interface and you can bind these queries to named ranges to use the query results in other runtime calculations.
What is a Query?
A Query consists of a data model and a query statement. The data model comes from the underlying data structure of the selected application for which the query is being created. A query statement is an SQL statement which is created in the background based on column selections and conditions. You don’t need any knowledge in creating database queries through coding.
How to Create a Query?
The Queries submodule can be found under the Names module, which can be accessed from the application home page. In the Queries page, press Add Query to begin creating a new query. On the Generate Query page, you can choose from available applications and data maps from the Application dropdown. Please note that this list only contains applications that have a database created. When you make a selection,
- The page will refresh, and you will see the Query Editor.
- Entities panel contains the table and column information for the selected application or data map.
- On the Conditions pane, you can add restrictions for the data being displayed.
- A named range selection should be made from the Bound to Named Range dropdown, which is going to be filtered based on to the selected query.

Application
Begin by selecting a web application or data map as the data source which will be queried to retrieve data. Once you make a selection, the page will refresh and you will see the Query editor.
Name
The name is simply an identifier name which is used to distinguish between all active queries for the particular web application. This field will not be visible to your end users.
Query Builder
Query are built through the builder panels and controls.
Entities
On the Entities panel, you can view and select table and column information retrieved from the data source. You can select columns and use Add condition(s) or Add column(s) buttons on the bottom of this panel to add columns and conditions to the query as a batch.
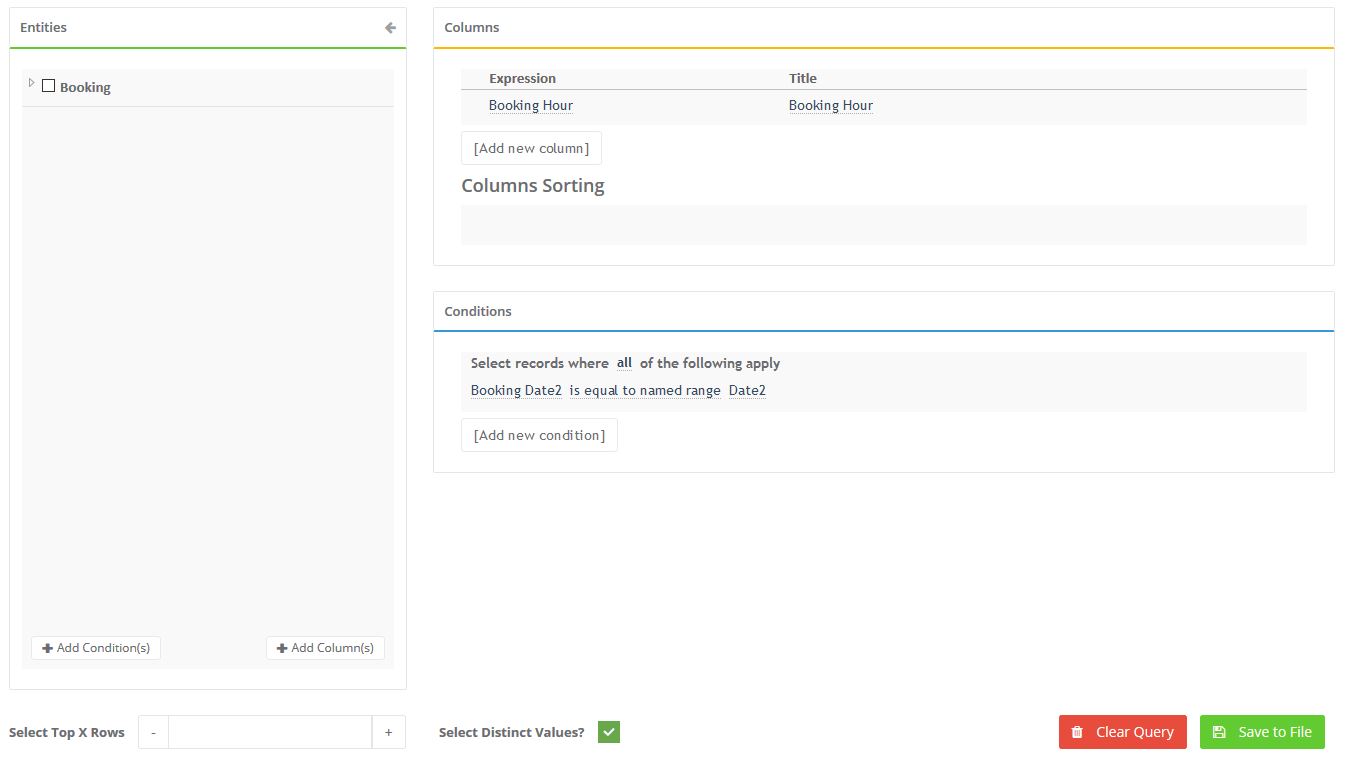
Columns
The Columns panel consists of Expression and Title columns, and two buttons for adding or removing aggregate functions. Under the the Expression column, you can choose from columns added through the Entities panel. The Title can be edited to change the column name in the query results. When you click the functions button denoted by f, you can make a selection from a list of functions that can be applied to the selected column. Sum, Count, Average, Maximum, Minimum are some of the aggregate functions that can be selected.
Conditions
You can add a condition or a group of conditions from the Conditions panel. The conditions are filtered based on the type of column selected. For example, a field with numeric values will contain conditions like “is equal to”, “is between”, and “is less than”. On the other hand, a datetime field will contain conditions like “within today”, “within this year”, and “before”. A group of conditions is a composite condition where “All”, “Any”, “None”, or “Not all of” the conditions apply. Some conditions can be bound to named ranges instead of static values. Any condition that contains “named range” in its text will be bound to one or more named ranges. The named range values in the conditions will be calculated and injected in the query during runtime calculations.
Select Top
You can limit the results to include only a certain number of top numbers using the Select Top X Rows control.
Select Distinct
When the Distinct Values is enabled, only distinct values will be retrieved from the database.
Execute Query
Pressing the Execute button will run the query and show the immediate results. This button is available for queries that do not have named range dependency conditions. After the query is executed, the query results can be exported into an Excel or CSV file using the Export to Excel and Export to CSV buttons.
Show/Hide SQL
You can see the actual query that will be executed during calculations by pressing the Show / Hide SQL button. Note that this is a readonly field, and is only displayed for your information.
Query Triggers
By default, queries will run when a calculate event occurs, either automatically or with the press of an action button. You might want to change this behavior for reasons like improving the application load and calculation performance, or tie the data to certain other events.
Trigger On Calculate (default)
This option indicates whether this query should run on every calculate event. This can happen as a result of pressing an Action Button that has Calculate event, or changing the value of a control that has the Trigger Calculations property enabled in the UI designer
Trigger On Load
This option indicates whether the query should be run on the initial loading of the application. Since loading is also a calculation, the TriggerOnCalculate functionality already covers this scenario. This setting can be useful for improving the application run-time, by preventing the queries from being triggered at initial load.
Skip On Load Record
This option is only available if Trigger On Load is enabled. This indicates whether the query triggering will be skipped on the initial load if the request is loading a record. In other words, if Skip on Load Record is enabled, the queries will only be run when a new record is being created, and nothing will happen when a record is being edited.
Named Range
You must select a Named Range to include the query results in runtime calculations. Named ranges are filtered based on the data type inferred from the query result.
Header Behavior
When using a Table-Named Range, you must also select a Header Behavior. There are 3 type of header behaviors:
- None: The query results will be injected into the named range beginning from the first row.
- Skip First Row: The first row will be left blank, and the injection will begin from the second row.
- Inject Headers: The first row where the column names coming from the query will be injected into the first row.