Create a SpreadsheetWeb API Client
Create a SpreadsheetWeb API client with guided access, tag scopes, permission reviews, credentials, and secure client secret management.
SpreadsheetWeb API clients let external systems connect to a workspace through the SpreadsheetWeb API. Each client has its own credentials, associated tags, and permission policy, so you can give an integration only the access it needs.
Note: API access depends on your SpreadsheetWeb subscription and workspace permissions. Free-tier users do not have access to this module by default.
Open the API client setup
- Sign in to SpreadsheetWeb Hub and select the workspace that will own the connection.
- Select API in the navigation menu.
- Select Create New Client.
The new setup uses six stages: Choose setup, Choose access, Choose tags, Review permissions, Name connection, and Review and create.
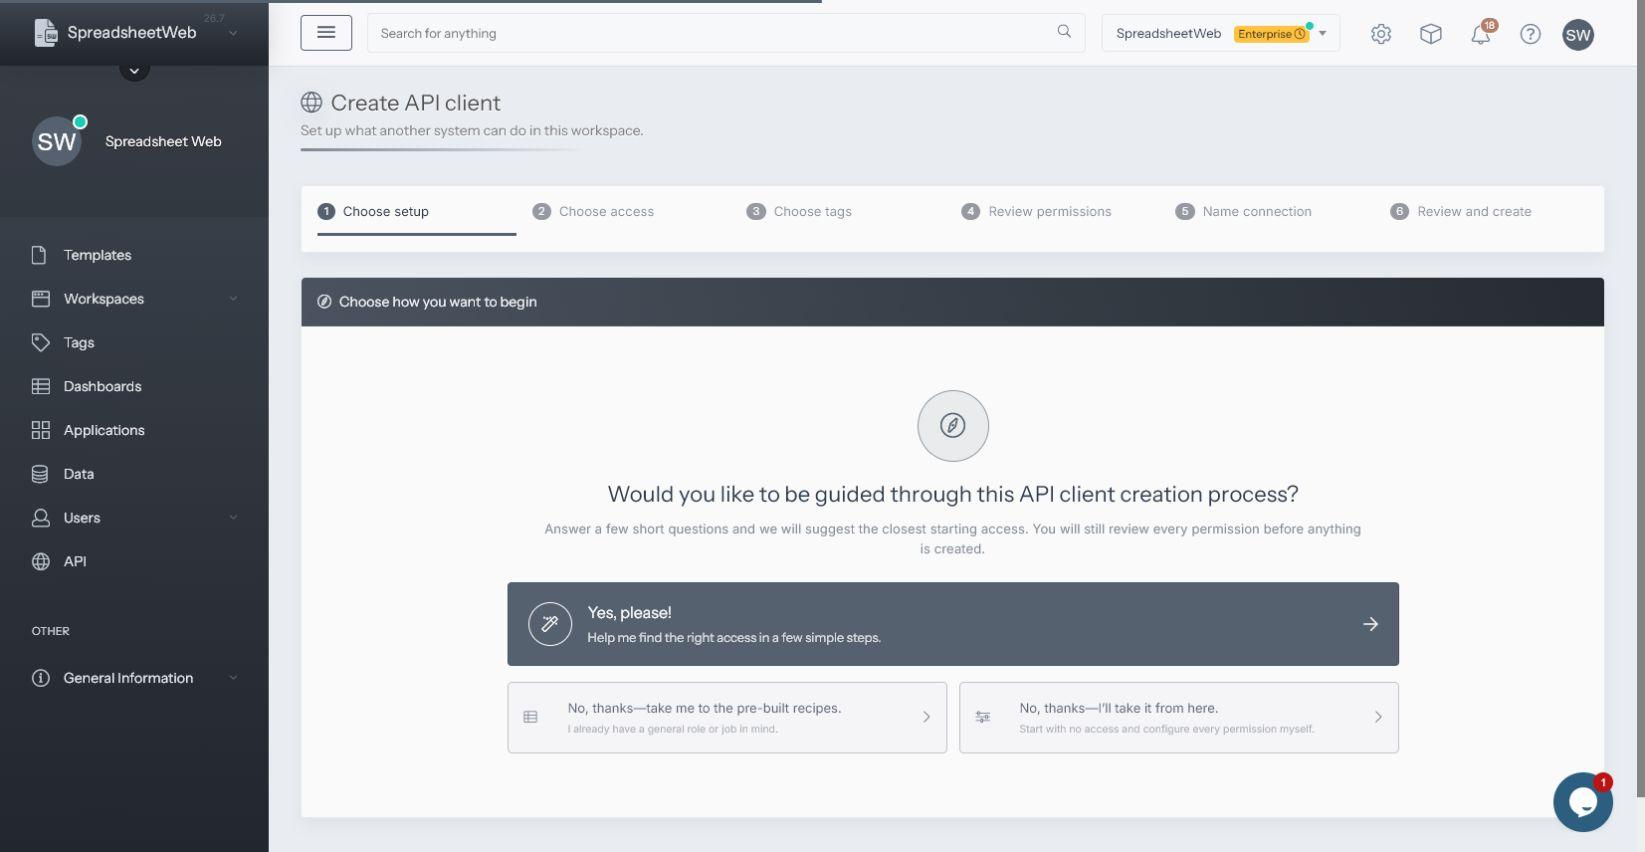
Choose a guided setup, a pre-built recipe, or a custom access policy.
1. Choose how to start
SpreadsheetWeb provides three starting paths:
- Guided setup: Answer a few questions about the connection’s job, application boundary, and record boundary. SpreadsheetWeb recommends the closest starting access.
- Pre-built recipes: Start from a common integration pattern, such as reading application data, calculating and updating data, deploying applications, importing or exporting data, synchronizing data, or maintaining workspace configuration.
- Custom policy: Start with no access and configure every permission yourself.
A starting point does not create the client or lock the policy. You can review and change every permission before creation.
2. Choose access boundaries
The guided path treats application access and record access as separate boundaries. First choose what the connection should do most often. Then decide whether it can reach:
- Applications whose tags match at least one tag associated with the client, or every application in the workspace.
- Every record inside accessible applications, or only records whose tags separately match the client’s associated tags.
SpreadsheetWeb compares your answers with the available recipes and recommends the closest match. Review the best match and the broader alternatives before selecting Use this starting point.
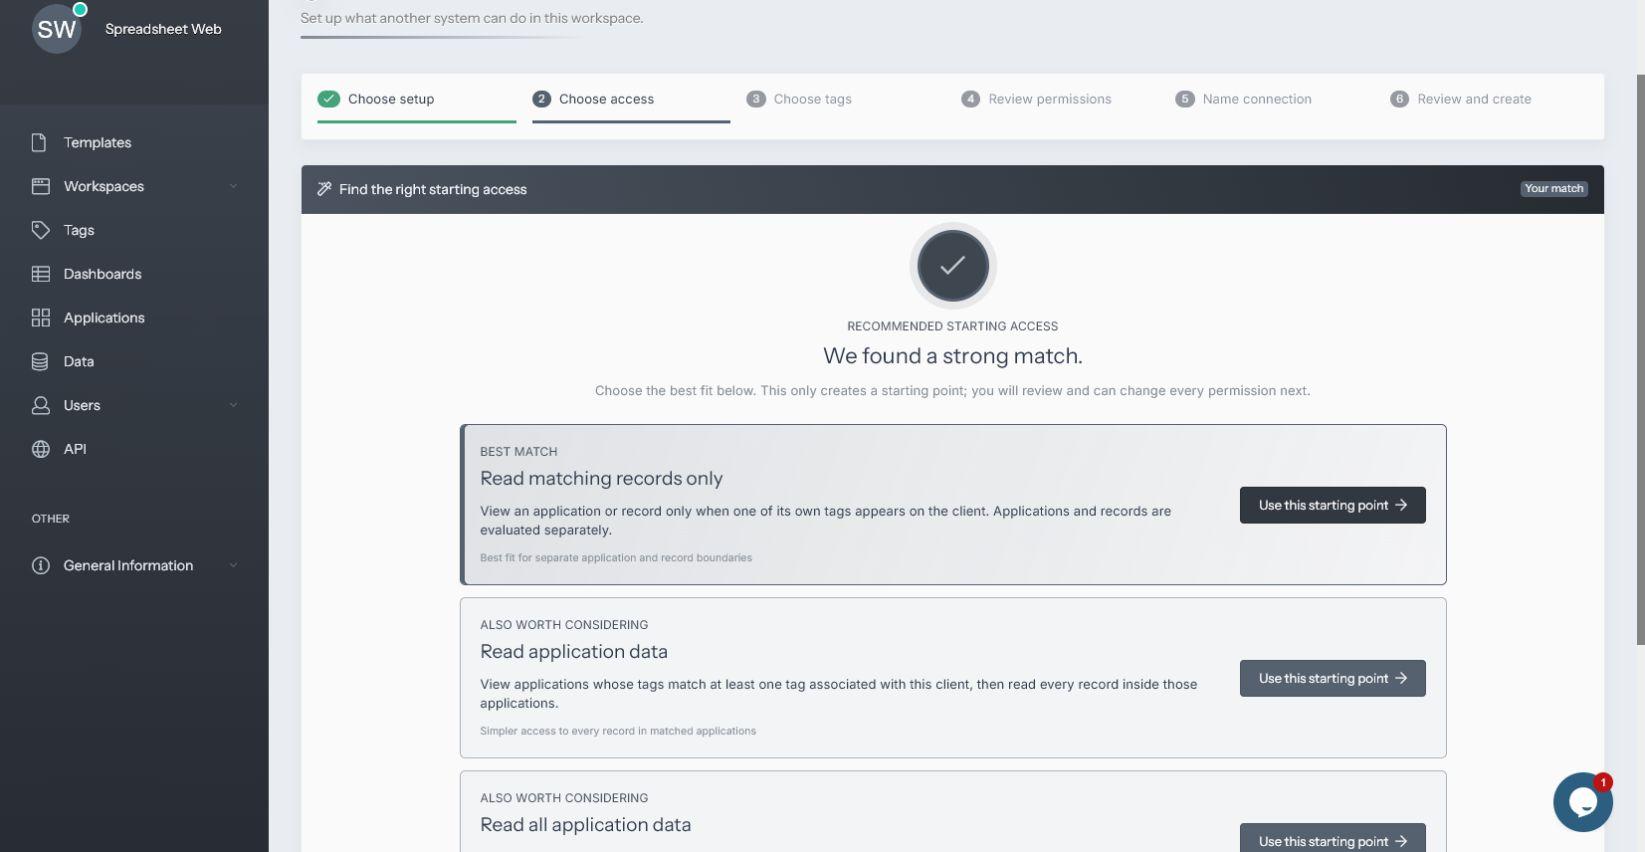
The guided questions produce a recommended starting policy and related alternatives.
3. Choose associated tags
If the selected policy uses tag-based access, choose one or more client associated tags. The live preview shows which applications match the current selection. Depending on the recipe, the same tags can also be evaluated separately against individual records.
Important: Associated tags grant no access by themselves. A permission must include an access rule that uses those tags. For tagged record access, the relevant application must assign the required tags when each record is saved. See Applying Tags While Saving a Record.
After configuring the tag boundaries, review the effective access summary. You can continue directly to naming, open the permission editor for fine-tuning, or return to the access choices.
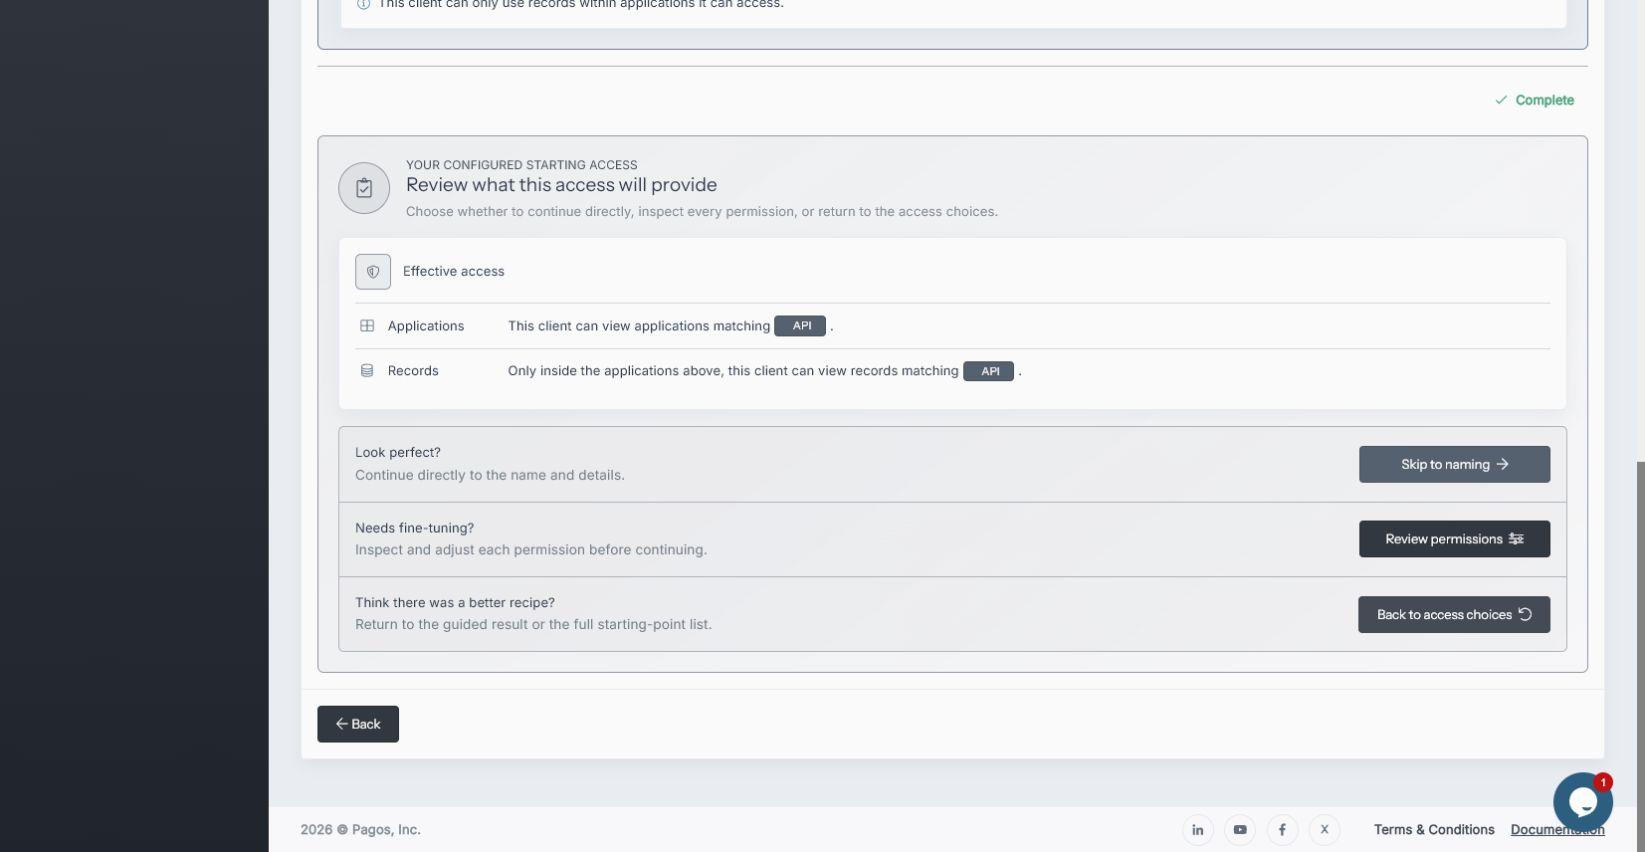
The summary explains the effective application and record boundaries in plain language.
4. Review permissions
The permission editor groups API rights into three areas:
- Workspace: Workspace settings, membership, and tag administration.
- Applications: Application access, execution, and administration.
- Data: Record access, editing, export, and maintenance.
Open each area to see the granted actions. You can add or remove permissions and edit the scope of each permission. Access rules can match one or every client associated tag, use a different set of selected tags, or apply across the workspace. Use the granted count on each area to confirm the final policy.
Apply the principle of least privilege. Grant only the actions and resource scopes required by the integration.
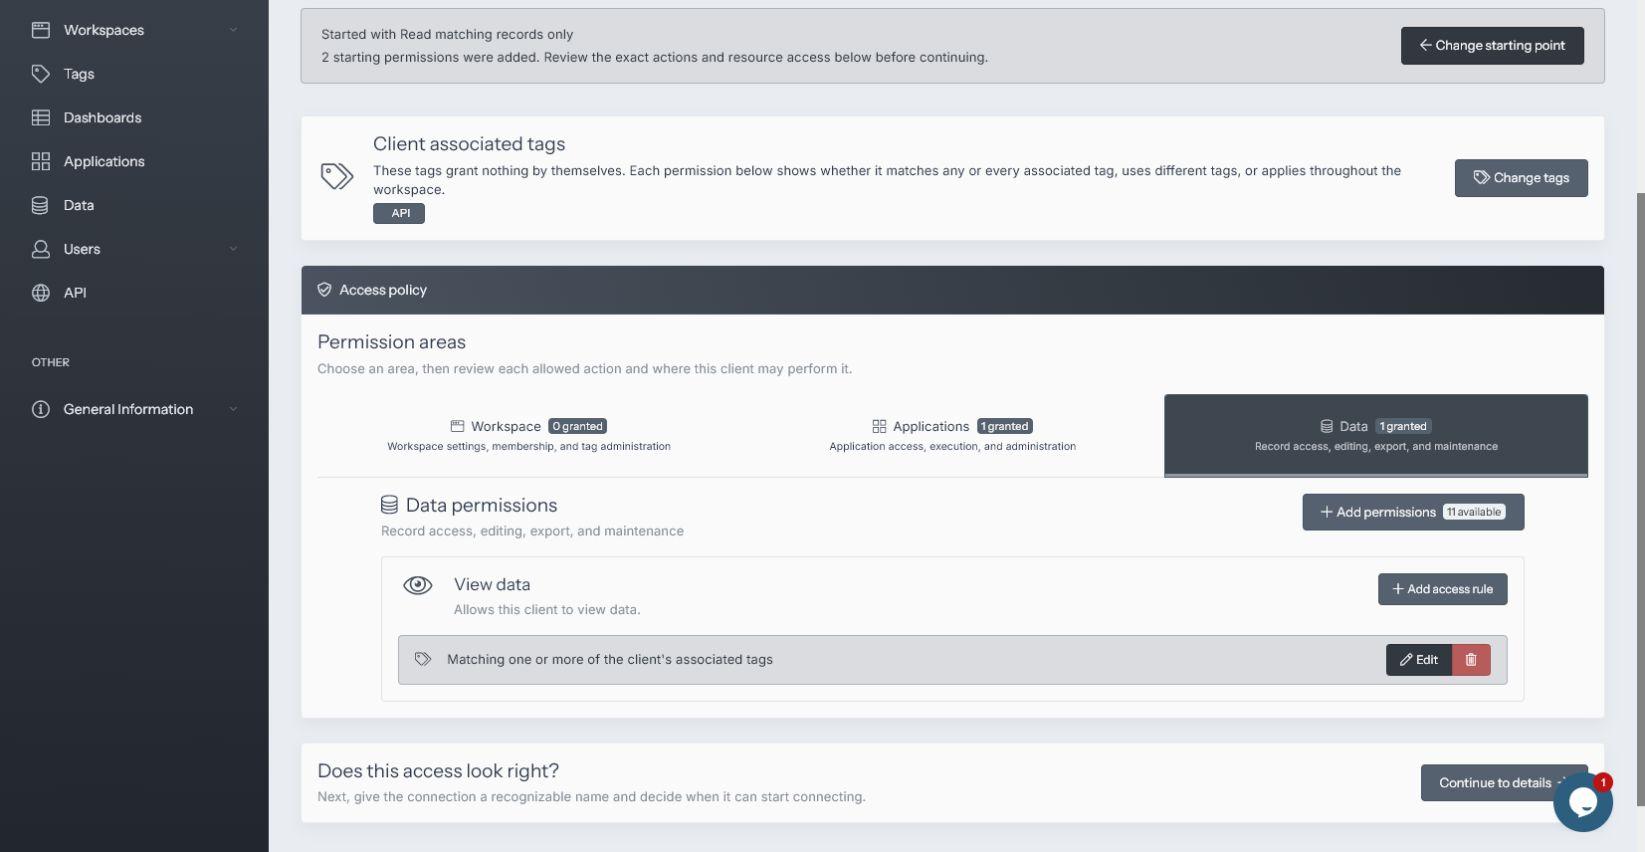
Review each API action and the resource scope where the client can perform it.
5. Name the connection
Enter a recognizable Name and an optional Description. A clear name should identify the external system or workflow, such as Finance Reporting or CRM Synchronization. Select Review setup to continue.
6. Review and create the client
The final review shows the client identity, associated tags, and effective permissions in plain language. Return to the previous stages if anything is incorrect. Pay special attention to warnings about tagged record access.
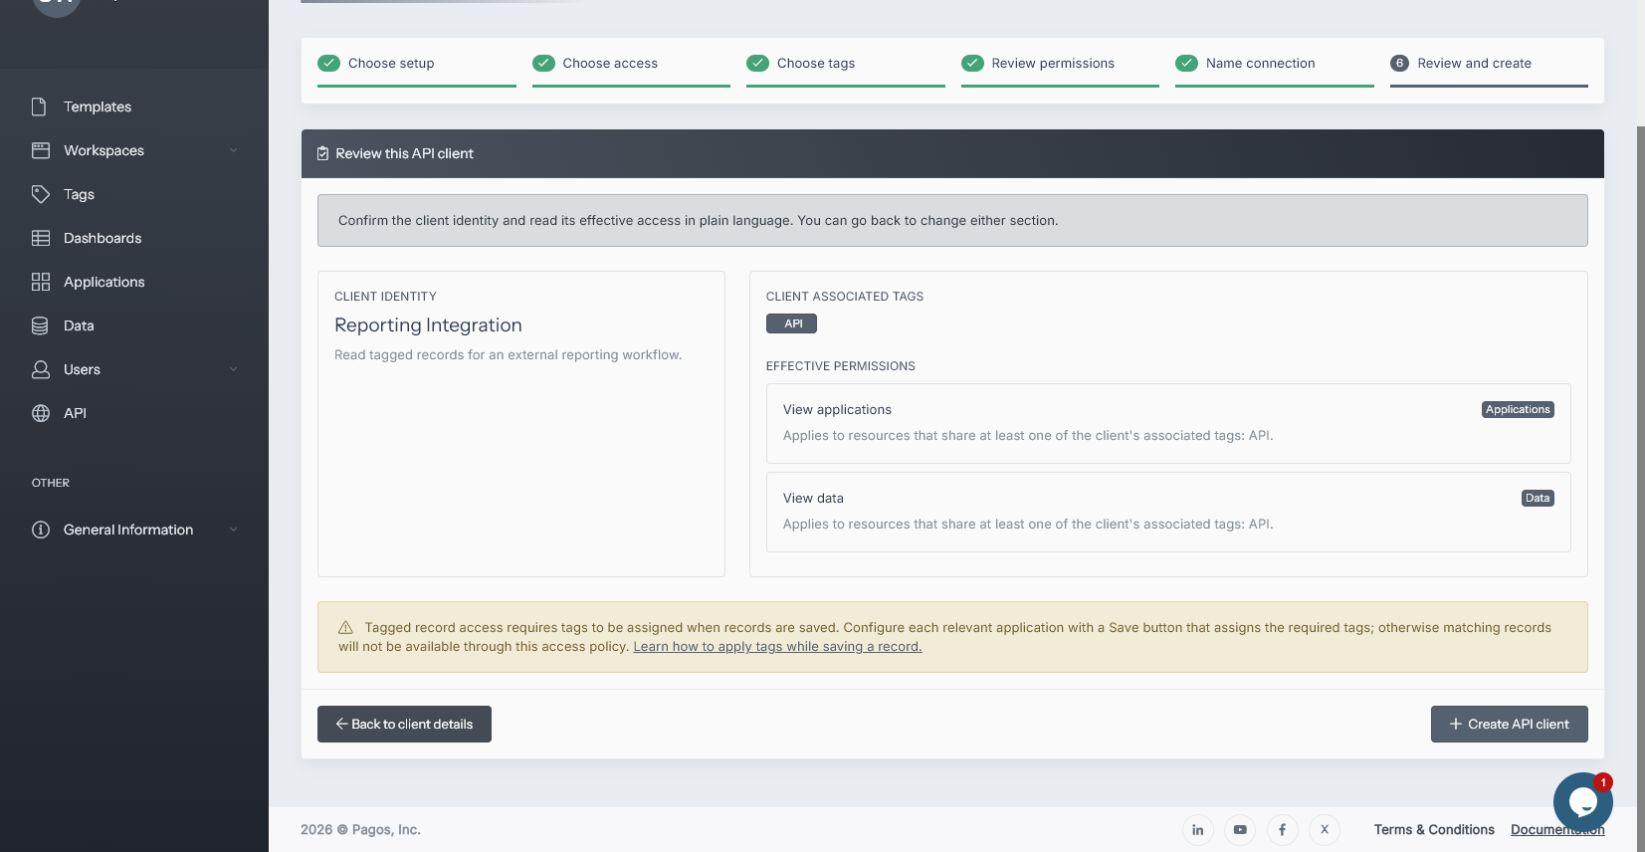
Confirm the client identity, associated tags, and effective permissions before creation.
Select Create API client only after the policy is correct. SpreadsheetWeb returns you to the API client list after creation.
View and manage client credentials
Open the client from the API page to view its connection details. The edit page includes:
- API root URL
- Workspace ID
- Client ID
- Client secret
Copy the API root URL, workspace ID, and client ID with their copy controls. The client secret stays hidden until you select Reveal client secret. Store the secret securely and do not place it in screenshots, tickets, or public documentation.
You can regenerate the client secret when needed. Regenerating it immediately invalidates the previous secret, so update the external integration before its next connection attempt.
You do not need to update the client simply to copy or reveal credentials. Select Update API client only after changing its name, description, active status, associated tags, or access policy.
Next step
Use the client credentials to request an access token and call the SpreadsheetWeb API. Continue with API Authentication.