Applying Tags While Saving A Record
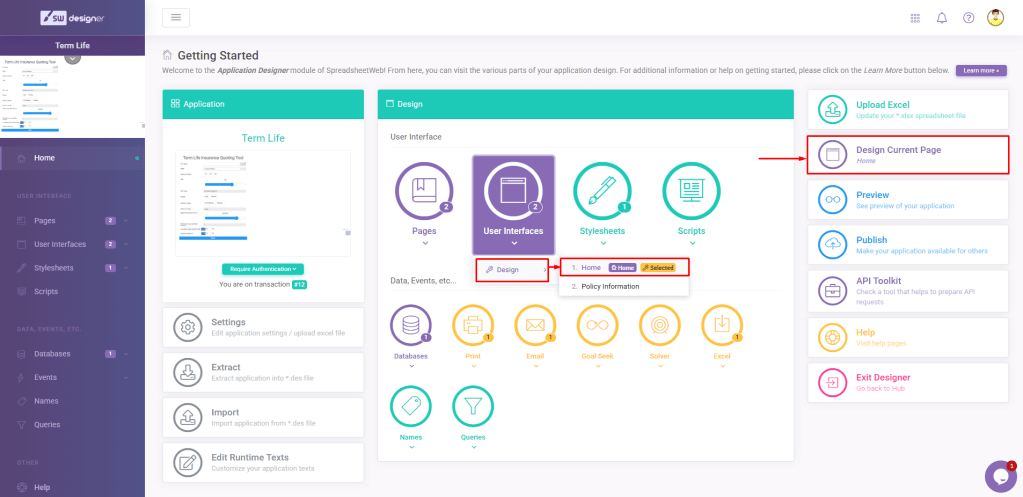
In SpreadsheetWeb Hub there is a new feature which lets you assign tags while saving a record. To use this feature, you need to have tags and add an action button to your application. If you have created tags, go to your Applications page, and click on Go to Designer for an application.

Choose User Interface.
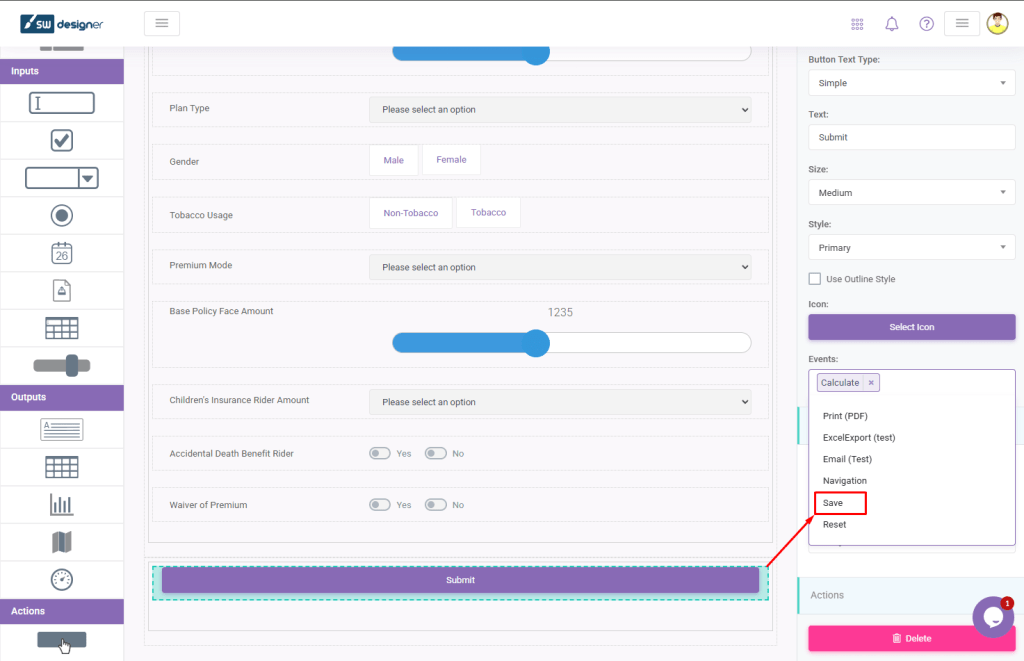
Drag and drop an action button to the staging area.

Next step is to add a Save Event to the Action Button.
Now you will have four options to choose as Upon saving a record, would you like to…
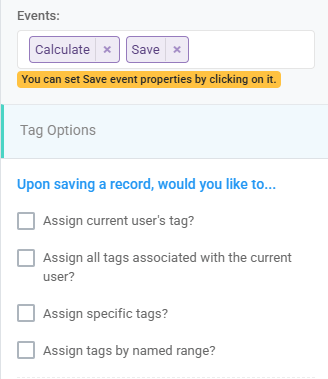
- Assign current user’s tags: If you select this option, the current user’s specific tag will be applied to the record. If the application is unrestricted and the user is unauthenticated, then no extra tag will be applied.

- Assign all tags associated with the current user: If you select this option, then the current user that is saving the record will have all of their associated tags applied to the record. For example, if the user is associated with an organization tag and a role tag, then those tags will be applied to the record.

- Assign specific tags: If you select this option, you will be able to select multiple, static tags that will be assigned to the record upon save.

- Assign tags by named range: If you select this option, you will be able to select a single named range that will be used to determine which tags to apply to a record. The value in the named range can be calculated, so you have full control from the workbook to determine which tags should be applied. (The use of this feature is described in more detail in the next section of this article.

Under these tag options you will also have three options to determine applied tags behaviours.
- Clear the existing tags: This option determines the general behavior for which tags will be applied to a record.

- Merge the existing tags with new ones: This option allows you to determine how you would like these tags to be applied on subsequent record saves. If you are editing a record, you can choose to merge the existing tags from the prior edit, or clear them on the subsequent save.
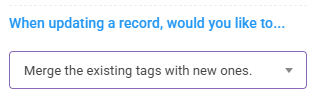
- Retain the existing tags without adding new ones: This option will retain the existing tags when updating a record. If you are editing a record, you can choose to keep or preserve any tags that were already associated with that record.

Applying Assign Tags by Their Named Range Feature
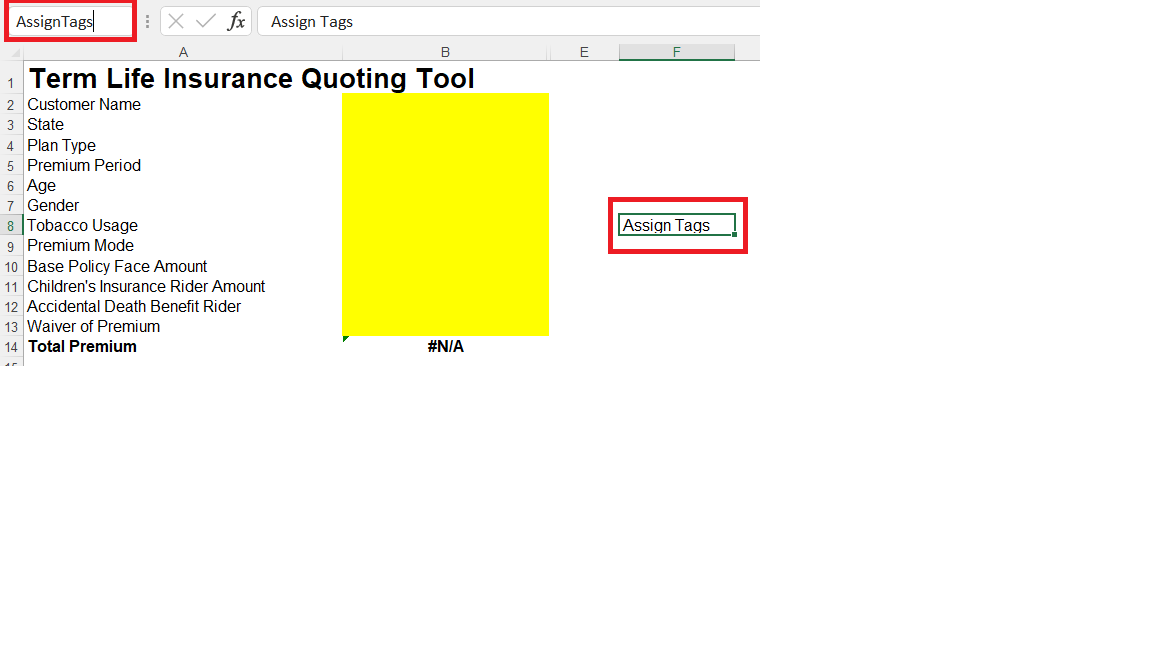
To assign tags by their named range you should update your Excel workbook which is related with your application. Open your Excel workbook and add a single cell give named range to it.
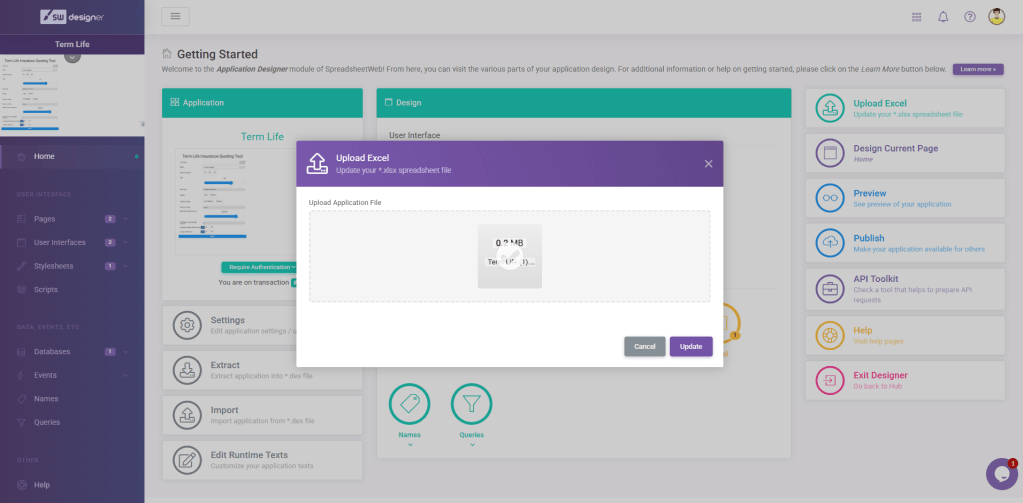
Save Excel workbook and go to your Applications page. Click on Go to Designer and go to Application module.

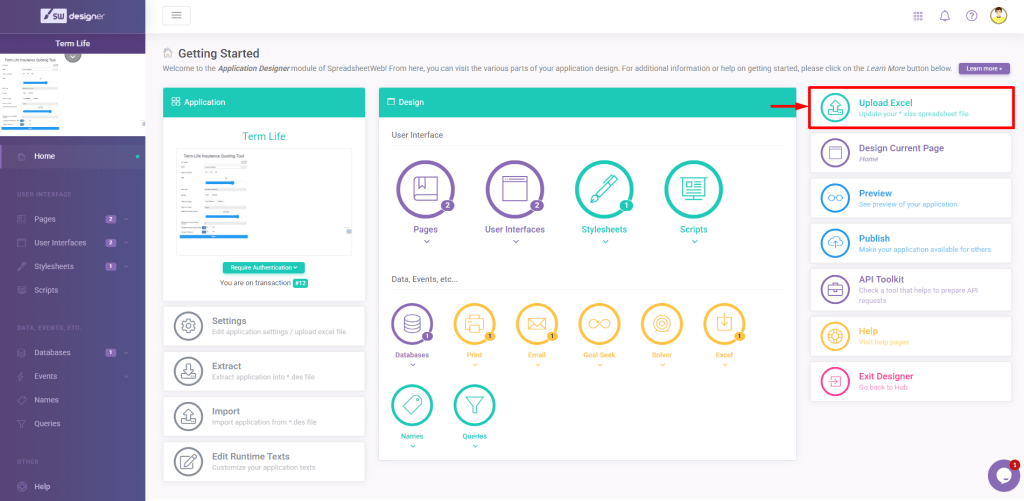
From this page you can update your Excel workbook.
Go to User Interface page.
Drag and drop an Action button to your staging area.
Add Save Event to the Action Button.

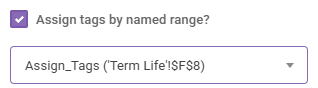
Check Assign Tag by Named Range and from the dropdown menu choose the named range you recently added to your workbook.
Drag and drop a Textbox to your staging area and from the dropdown menu choose same named range you recently added to your workbook. You can customize textbox controls if you want.

When you’re done do not forget to Publish the application.


Using Assign Tags by Named Range Feature
To use Assign tag by named range feature, you can choose to edit or copy a previously saved record or to create a new one. You can assign tags to by writing them down in the Assign Tags textbox.
PS: The valid characters for splitting are semicolon (;), comma (,), colon (:), and new line (\n)
Click on action button to save the record.
When you reload the data page you can see the new record with assigned tags by named range.