Uploading Files to Google Drive with Zapier
This article will show you how to automate the process uploading files via Zapier by connecting the SpreadsheetWeb Hub application with Google Drive.
Many businesses use different types of documents for different purposes. Non-disclosure Agreements (NDAs) are one of the most used documents types. NDAs protect confidential information. They are legal contracts between two or more parties in which one party (the disclosing party) agrees to share confidential information with another party (the recipient), and the recipient agrees to keep the information confidential. Therefore, automating sending NDAs and collecting e-signatures can be extremely time-saving for many businesses.
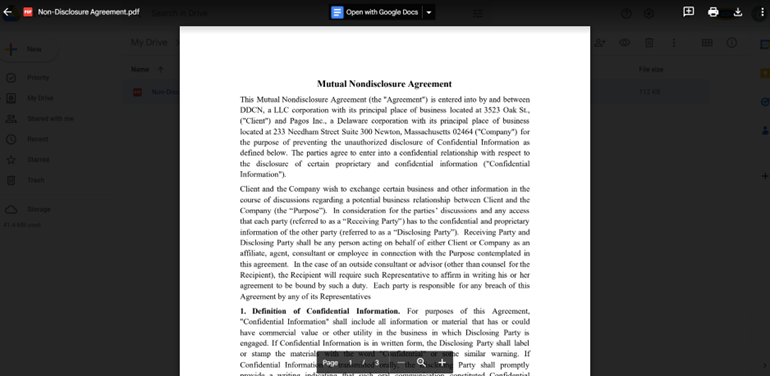
In this example, we will create a Zap on Zapier to connect the SpreadsheetWeb Hub application to Google Drive. Each time a new NDA document is created on SpreadsheetWeb Hub, this scenario will upload the file to Google Drive. Below is a screenshot from the Non-Disclosure Agreement application created on SpreadsheetWeb Hub. You can refer to this link on how to create a similar SpreadsheetWeb application.

The first step is to create a new Zap. Add a trigger. Choose the application as SpreadsheetWeb Hub and the event as New Data Record.

Then, connect with your SpreadsheetWeb Hub account.

Select your workspace and application’s name. Choose PrintPDF for the database columns. NDA document is saved in the PrintPDF database column in this demo application. It can be a different column name in your application.

Now, you can start to test the trigger event to make sure the connection is valid. You will see the values of a saved record under your SpreadsheetWeb Hub application.
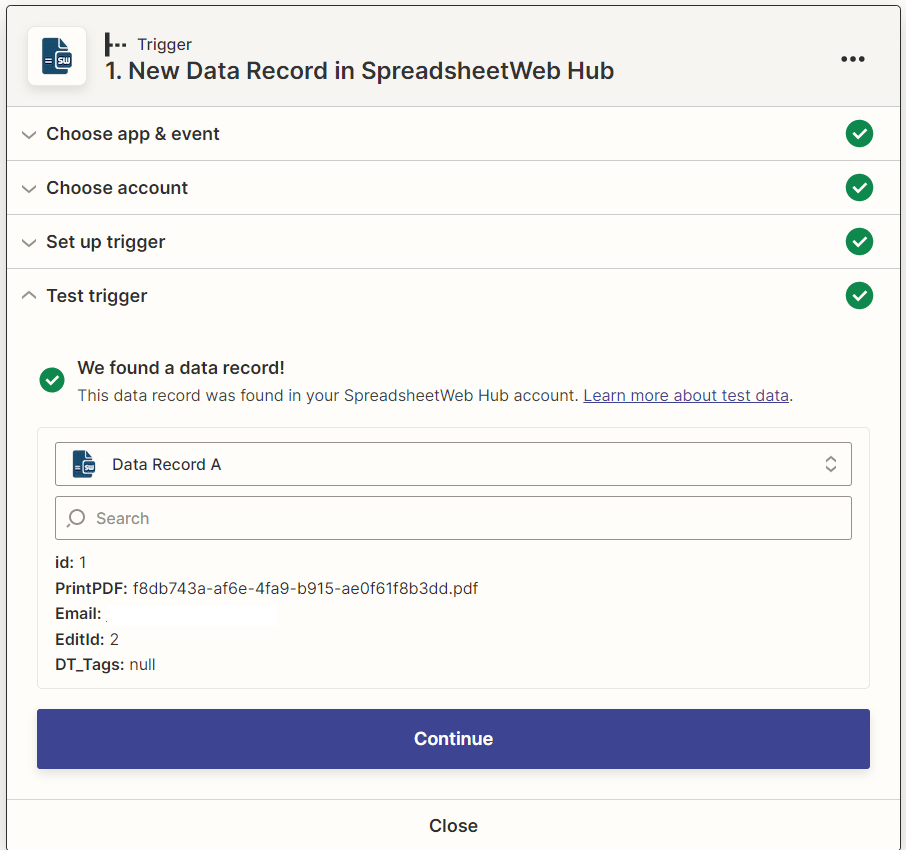
Tip: Save at least a record before testing. Zapier seeks an existing record to validate its connection test
After testing the trigger event, add an action. Choose the application as SpreadsheetWeb Hub and event as Get File.

Then, connect with your SpreadsheetWeb Hub account.

Choose the Attachment Data Column as PrintPDF and Data record as the ID from a previous trigger or action.

Test the action.

Next, add another action and choose Google Drive as the application and event as Upload a File.

Next, create a connection with your SpreadsheetWeb Hub account. Choose Folder, File URL and File Name.

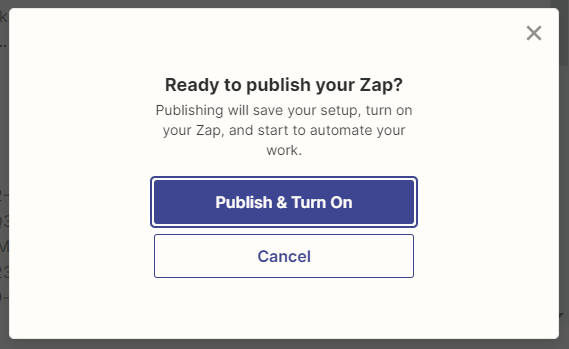
Then, continue and test the action. After testing, if it is successful, you can publish the Zap.
When you are done, load the SpreadsheetWeb Hub application, enter a set of inputs and hit Save. When you go to your Google Drive account, you will see the PDF file has been uploaded.
(Note: The process is asynchronous, so it may take a few minutes to appear.)