API Designer
The API Designer feature within the Hub simplifies the process of converting Excel spreadsheets into APIs. This can be done by uploading an Excel file and choosing the “API (without UI)” option.
This will yield an application that has a simplified designer interface, facilitating:
Increased Efficiency: It accelerates the development and deployment of services by eliminating the need for complex back-end coding removes the standard UI design tools that are irrelevant to API models.
Improved Access: It ensures that calculations from spreadsheets is readily accessible for use across various platforms, aiding in internal operations, data sharing, and application development.
API Designer
In the Hub, navigate to the Applications section to initiate API creation. Here, you can generate API by uploading an Excel file. After uploading, choose the API (without UI) option from the dropdown menu, as illustrated below. This process facilitates the creation of APIs directly from your Excel model.

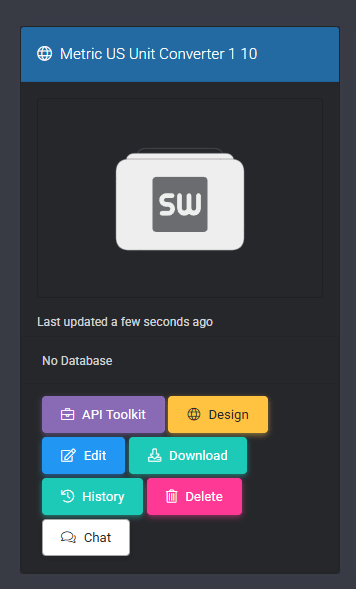
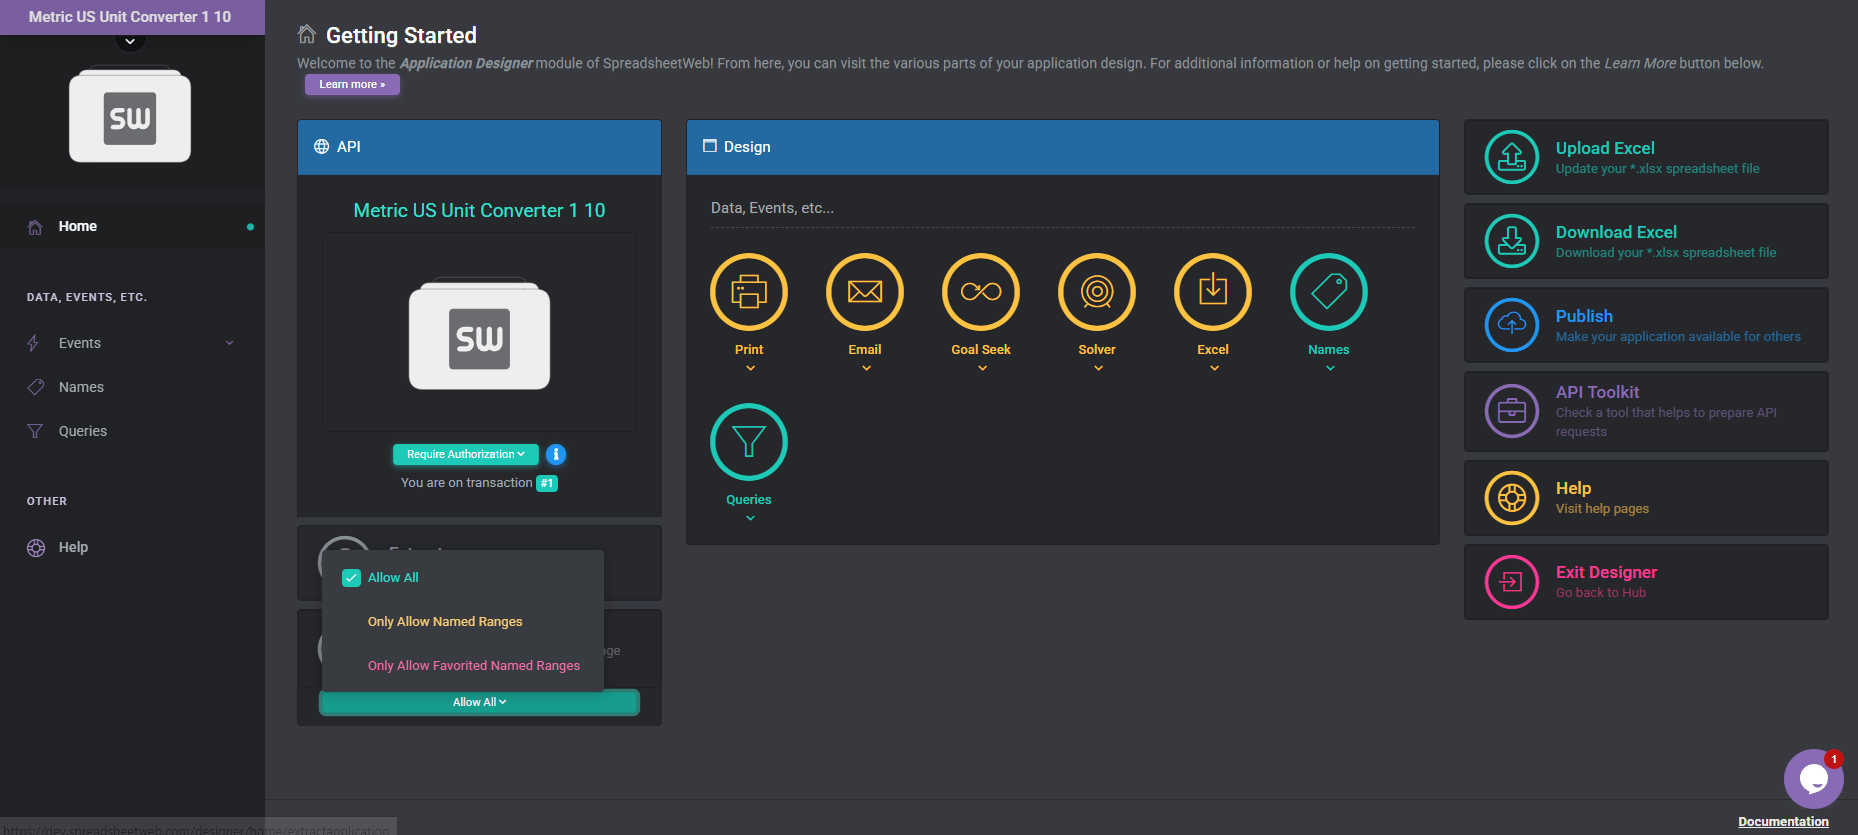
The SpreadsheetWeb Hub will direct you automatically to the Applications page. From there, select the Design button on your new application to access the API designer.
The homepage of the API Designer features four main modules: the API module, the Databases module, the Events Module (which supports Excel Export, Print, and Email Processes), and the Names Module (for overriding named ranges).

Note: in private cloud and server licenses, Events module also include Goal Seek and Solver. And there are also queries available under Names in private.
The API Module enables you to refresh your source Excel file and manage API access settings (i.e., allowing you to configure restricted or unrestricted access) via the Edit button.

By clicking the relevant buttons, you can either extract data from or publish your API application.
Note: The Extract button allows you to download the API application as a single file with a .DES extension, functioning similarly to what you’d expect in standard designer applications.
Events Module
The Events module offers three distinct functionalities: you can set up processes for Printing and Emailing, as well as utilize an option for Excel Export.

The Names Module is intended for the modification of named ranges.
This update introduces significant enhancements to the platform’s API functionality, focusing on the Events module and the CalculateSingle API endpoint.
The events configured through the user interface are now fully accessible via the CalculateSingle API endpoint. This feature means that users can more easily trigger core functionalities such as Print, Email processes, and Excel Export options programmatically, while configuring them in the familiar SpreadsheetWeb Hub Designer interface. This integration represents a leap forward in usability, allowing for seamless execution of these features without manual intervention.
The CalculateSingle API method now includes support for targeting specific transactions using the `TransactionSequenceId` parameter. This parameter enhances the API’s flexibility by enabling users to specify and target historical versions of their workbook and all defined events. This is particularly useful for users who need to access or revert to previous states of their data or functionality, providing a layer of precision and control over their API interactions (e.g., rate versions, reference data changes, matching and validating newer data models). Note that – on the public cloud environment – only the last 10 recent transactions are stored per application. The retention of older versions is limited to private cloud and dedicated Hub server installations.
Exploring API Designer Through a Sample Postman Collection
This section introduces the API Designer via a sample Postman collection available for download at the provided link. To illustrate its capabilities, we’ll employ an Excel-based mortgage calculator, which you can download from this link.
For this demonstration, we’ll concentrate on three inputs: the loan amount, interest rate, and loan duration (in years), alongside a single output: the monthly loan payment.

Step 1: Setting Up a API Client
Initially, you’ll need to set up a API client, assuming you haven’t done so already. A API client acts as a bridge between your application and the API, facilitating requests and responses. It’s essentially a registered entity within the API platform that has permission to make API calls.
This client generate two critical pieces of information: a Client Identifier and a Client Secret. The Client Identifier is a unique public identifier for your application, similar to a username, while the Client Secret acts like a password, providing authentication and ensuring that requests from your application are securely authorized. It’s important to keep the Client Secret confidential and secure, as anyone with access to both your Client Identifier and Client Secret can make requests on behalf of your application.
Further details on creating a API client can be found at the link.
Step 2: Creating a API
After setting up your API client, the next step involves converting the Excel mortgage calculator into a functional API application. This process enables the Excel file’s logic to be accessed and executed through web API calls, thereby transforming your spreadsheet into a back-end calculation tool.
Start by uploading the Excel mortgage calculator file you downloaded earlier. This file serves as the foundation for your API, containing the necessary calculations and data structure.
Once your API is configured, you need to obtain an Application ID. This unique identifier is critical for API requests as it tells the system which API application to interact with. You can find the Application ID by navigating to the application’s settings and clicking the “Edit” button. This ID will be used in subsequent steps to direct your API calls correctly.

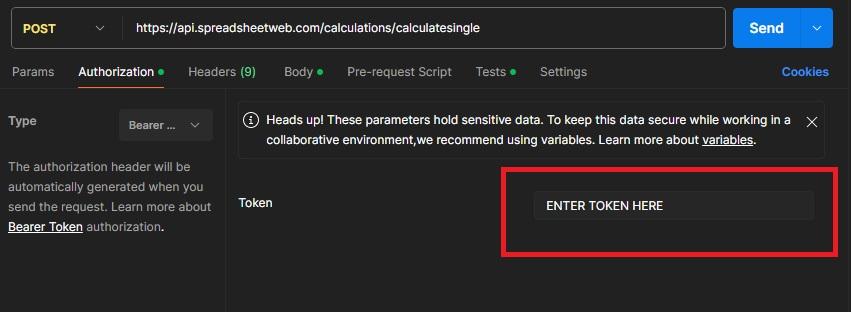
Step 3: Acquiring an Access Token
After establishing a API client and setting up your API application, the next step is acquiring an access token. This token is essential for authenticating your API requests, ensuring that they are valid and authorized.
To obtain an access token, you must make a request to the authentication endpoint https://identity.spreadsheetweb.com/connect/token, where you send your Client Identifier and Client Secret. The request to the authentication endpoint must include your Client Identifier and Client Secret.

The type of token issued is a “Bearer” token. This means that the token must be included in the header of subsequent API requests. Access tokens are short-lived for security reasons, expiring after an hour. You must be prepared to request a new token upon expiration if your application needs to make additional API calls.
Step 4: Submitting a Calculation Request
With an access token in hand, the next step involves making a calculation request to the API using the Excel model’s functionality. Before you can make a calculation request, ensure you have the necessary information: the bearer access token, the application ID from Step 2, and the workspace ID. The application ID identifies the specific Excel model you’re using, and the workspace ID may be required for accessing the right environment or context in the API.
The calculation request is made to the endpoint https://api.spreadsheetweb.com/calculations/calculatesingle.
The body of your request must include the inputs for the calculation. This includes specifying the workspaceId and applicationId to identify the environment and application.

Additionally, you must detail the inputs for your calculation, such as loan_amount, interest_rate, and loan_period. These can be referenced by their named ranges in the Excel file or by their cell references, i.e. Sheet1!A1, if named ranges aren’t defined.
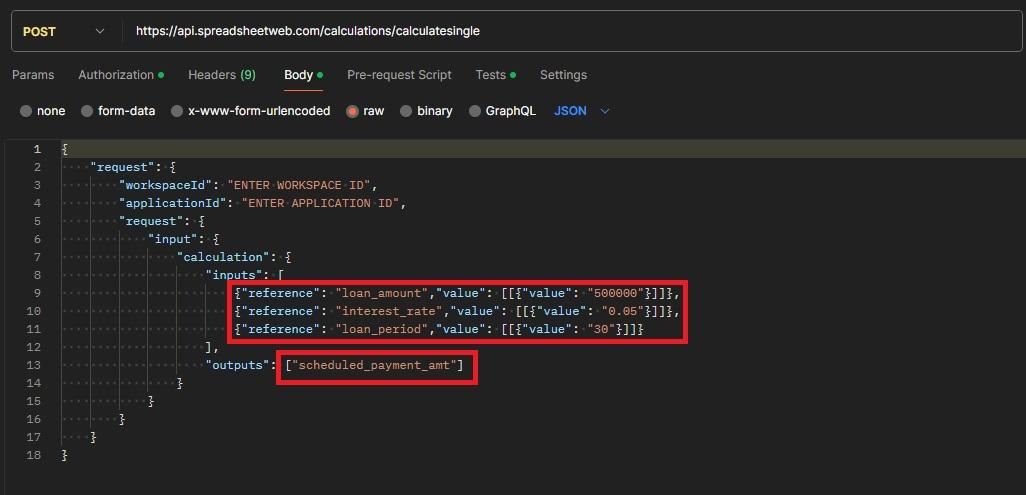
The output section lists the named range schedule_payment_amt, which corresponds to the monthly loan payment in Excel. This call will return the calculated value from the API. You can include additional outputs in the call by adding their named ranges or references, separated by commas.
The API response includes calculated values for each output specified in the request and their formatted counterparts, applying the number formatting defined in the Excel file for those particular cells. This ensures that users receive not only the raw calculation results but also these results presented with the familiar formatting from the Excel environment.

Step 5: Save Request (Optional)
After successfully making calculation requests and receiving responses, you might find the need to store this data for future reference, analysis, or compliance purposes. While the consuming application can certainly handle data storage on its end, SpreadsheetWeb offers a built-in solution to this need through its database module.
First ensure that the database module is activated for your application. Refer to the Database Module above on how to activate this module. Also refer this link on how to build database tables. to The database module allows for the structured storage of data generated through your API interactions in a tabular format within SpreadsheetWeb’s database environment.
Unlike other systems that might store the entire JSON payload of each request and response, SpreadsheetWeb focuses on storing the inputs and outputs specified in the JSON message. This selective storage approach ensures that only relevant data is kept, reducing storage requirements and simplifying data management.
Accessing your stored data is straightforward. Navigate to the Data page within the SpreadsheetWeb interface. Here, you’ll find a list of all data associated with each API call. The platform provides metadata for each entry, such as the date and time of the request, and the identifier of the requesting API client, offering valuable context for each data point.

SpreadsheetWeb allows for customization of the Data page. You can choose which inputs and outputs to display, tailoring the view to focus on the most relevant data for your needs. Furthermore, the platform supports the addition of search and filter functionalities, enhancing your ability to manage and navigate through the stored data efficiently.

The stored data can serve multiple purposes, from auditing and compliance tracking to data analysis and reporting. By leveraging the database module, you can ensure that your application not only benefits from the real-time calculation capabilities of SpreadsheetWeb but also capitalizes on the long-term accumulation of data.
Step 6: Formula Auditing (Optional)
Another important feature of SpreadsheetWeb API is its ability to audit calculations performed within the spreadsheet model for every API request. This functionality is particularly valuable in industries subject to stringent regulations, where detailed examination of each calculation per API call might be necessary.
SpreadsheetWeb offers an integrated capability to generate and export a version of the spreadsheet model that reflects the data entered through each API call. This enables the utilization of Excel’s formula auditing tools to track and verify each step of the calculations, aligning with auditing requirements.
The first step in the process is to add a new Excel Export event with Type set to Current Spreadsheet.

The next step is to add the ID associated with this Excel export to the API request.

The system will then provide a URL for downloading the Excel document, which has been populated with the inputs from the request. Alternatively, there’s an option to save this Excel file within SpreadsheetWeb’s own database for every request, rather than maintaining these files on the client side.
Access Type
Your application now supports three distinct access types for interacting with calculation endpoints:
- Allow Anonymous
- Require Authentication
- Require Authorization
1. Allow Anonymous
- No Authentication Required: This access type allows users to access calculation endpoints without any form of authentication.
- Public APIs: Ideal for scenarios where you want to expose certain calculation functionalities publicly without restricting access.
- Integration with External Tools: Facilitates easier connections between SpreadsheetWeb web-service applications and other tools that may not support complex authentication mechanisms.Restrictions:
- No Data Loading: Since there’s no authentication, loading or accessing specific record data is not supported to prevent unauthorized data exposure.
- Limited Security: While it simplifies access, it’s essential to ensure that sensitive operations are not exposed through this access type.
2. Require Authentication
- Authentication Needed: Users must authenticate using
client_credentialsto access calculation endpoints. - No Explicit Access to Specific Applications: As long as the client is part of the workspace, calculations can be performed.
- Data Loading with Authorization: Users need appropriate rights to load and manipulate data.
3. Require Authorization
- Authentication and Authorization Needed: Users must authenticate and have explicit access permissions to specific applications (via tags or “All applications” rights).
- Enhanced Security: Ensures that only authorized users can access and perform calculations on specific applications and data.

Named Range and Cell Based Restrictions
This feature provides fine-grained control over API access to the contents of your Excel file by allowing you to restrict which named ranges and cell references can be accessed. It enhances data security by ensuring that only the intended portions of your spreadsheet are exposed through API calls. You can choose from three levels of access control, each offering a different balance between flexibility and security:
- Allow All – This is the least restrictive option. It permits API access to all named ranges in the Excel file, as well as to any cell by its reference (e.g., Sheet1!A1, Sheet2!B2). Use this setting if your application requires open access to both named ranges and direct cell references.
- Only Allow Named Ranges – This option disables access to cells by their references, limiting API access to only those areas of the spreadsheet that are defined as named ranges. It provides better control over which parts of the spreadsheet can be accessed, while still allowing full use of named ranges without additional configuration.
- Only Allow Favorited Named Ranges – This is the most restrictive option. It blocks access to both cell references and all non-favorited named ranges, allowing only the specific named ranges that have been marked as Favorited through the Names Editor. This setting is ideal for scenarios where data sensitivity is high and you want to strictly control what is exposed through the API.
To use the third option, navigate to the Names Editor and mark the named ranges you want to allow as Favorited. These favorited named ranges will be the only ones accessible via the API when this setting is selected. Refer to the screenshot below for guidance on how to favorite named ranges.

By choosing the appropriate option, you can tailor the level of API access to match the security and functional needs of your application.