HubSpot
HubSpot CRM-SpreadsheetWeb Integration
By integrating SpreadsheetWeb with the HubSpot CRM, you will get to create workflows that automate how data and applications are integrated between the two services. This tutorial will go over setting up an integration between the two services, configuring CRM objects, and fine-tuning your applications to work in harmony between SpreadsheetWeb and HubSpot.
Prerequisites
Before following this documentation, make sure you meet the following criteria:
HubSpot Account: You must have a valid HubSpot account with sufficient permissions.
SpreadsheetWeb Account: An active account in SpreadsheetWeb where at least one application has been created.
Public SpreadsheetWeb Application: The application you will integrate must be made public.
How to Integrate SpreadsheetWeb into HubSpot
To integrate SpreadsheetWeb with HubSpot, you first need to install the SpreadsheetWeb App from the HubSpot Marketplace.


Once installed, connect the two applications by authorizing SpreadsheetWeb’s access to HubSpot. This ensures a secure connection between the two platforms, enabling data sharing and automation.
To get started with the integration, first log into your HubSpot. Next, find the SpreadsheetWeb Calculator button on the right panel under the CRM card.
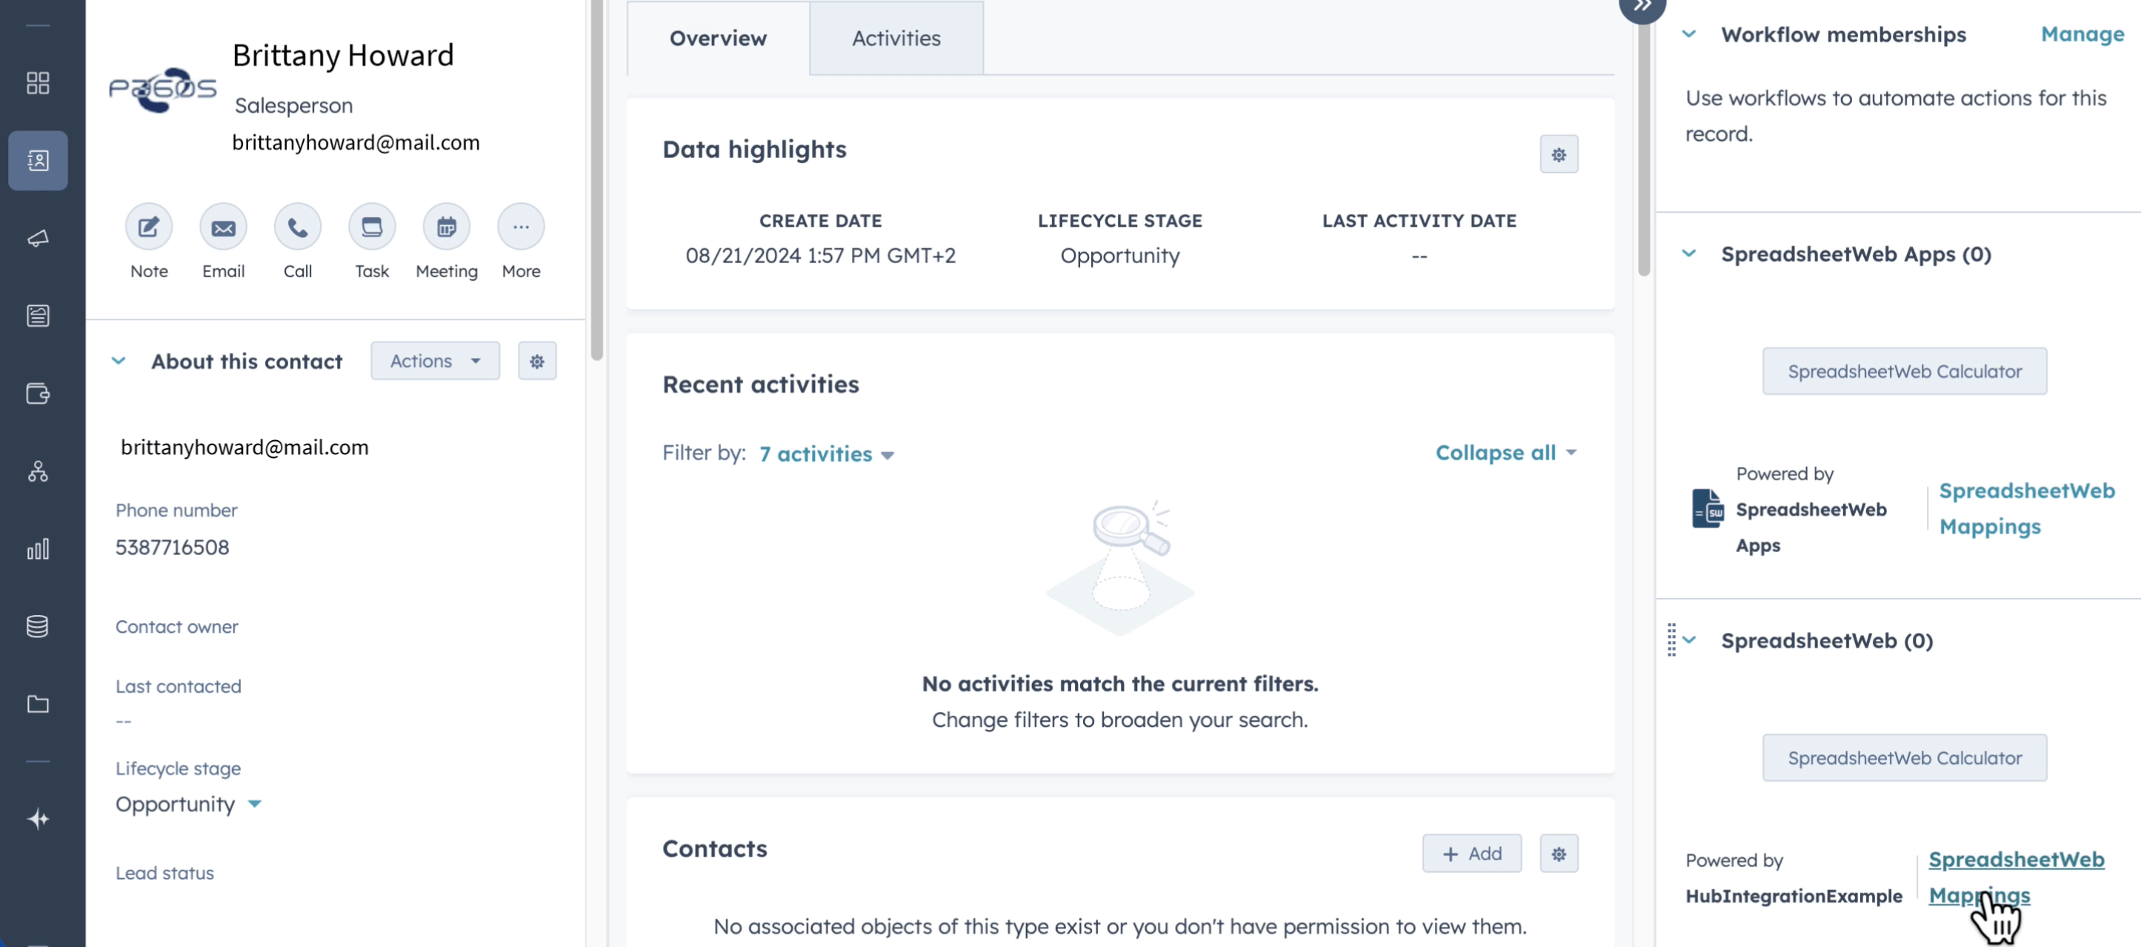
This opens a new window that connects to the SpreadsheetWeb Hub when clicked. The new window will require you to log into your account with SpreadsheetWeb. If you have more than one account or workspace, choose the one related to the CRM data.
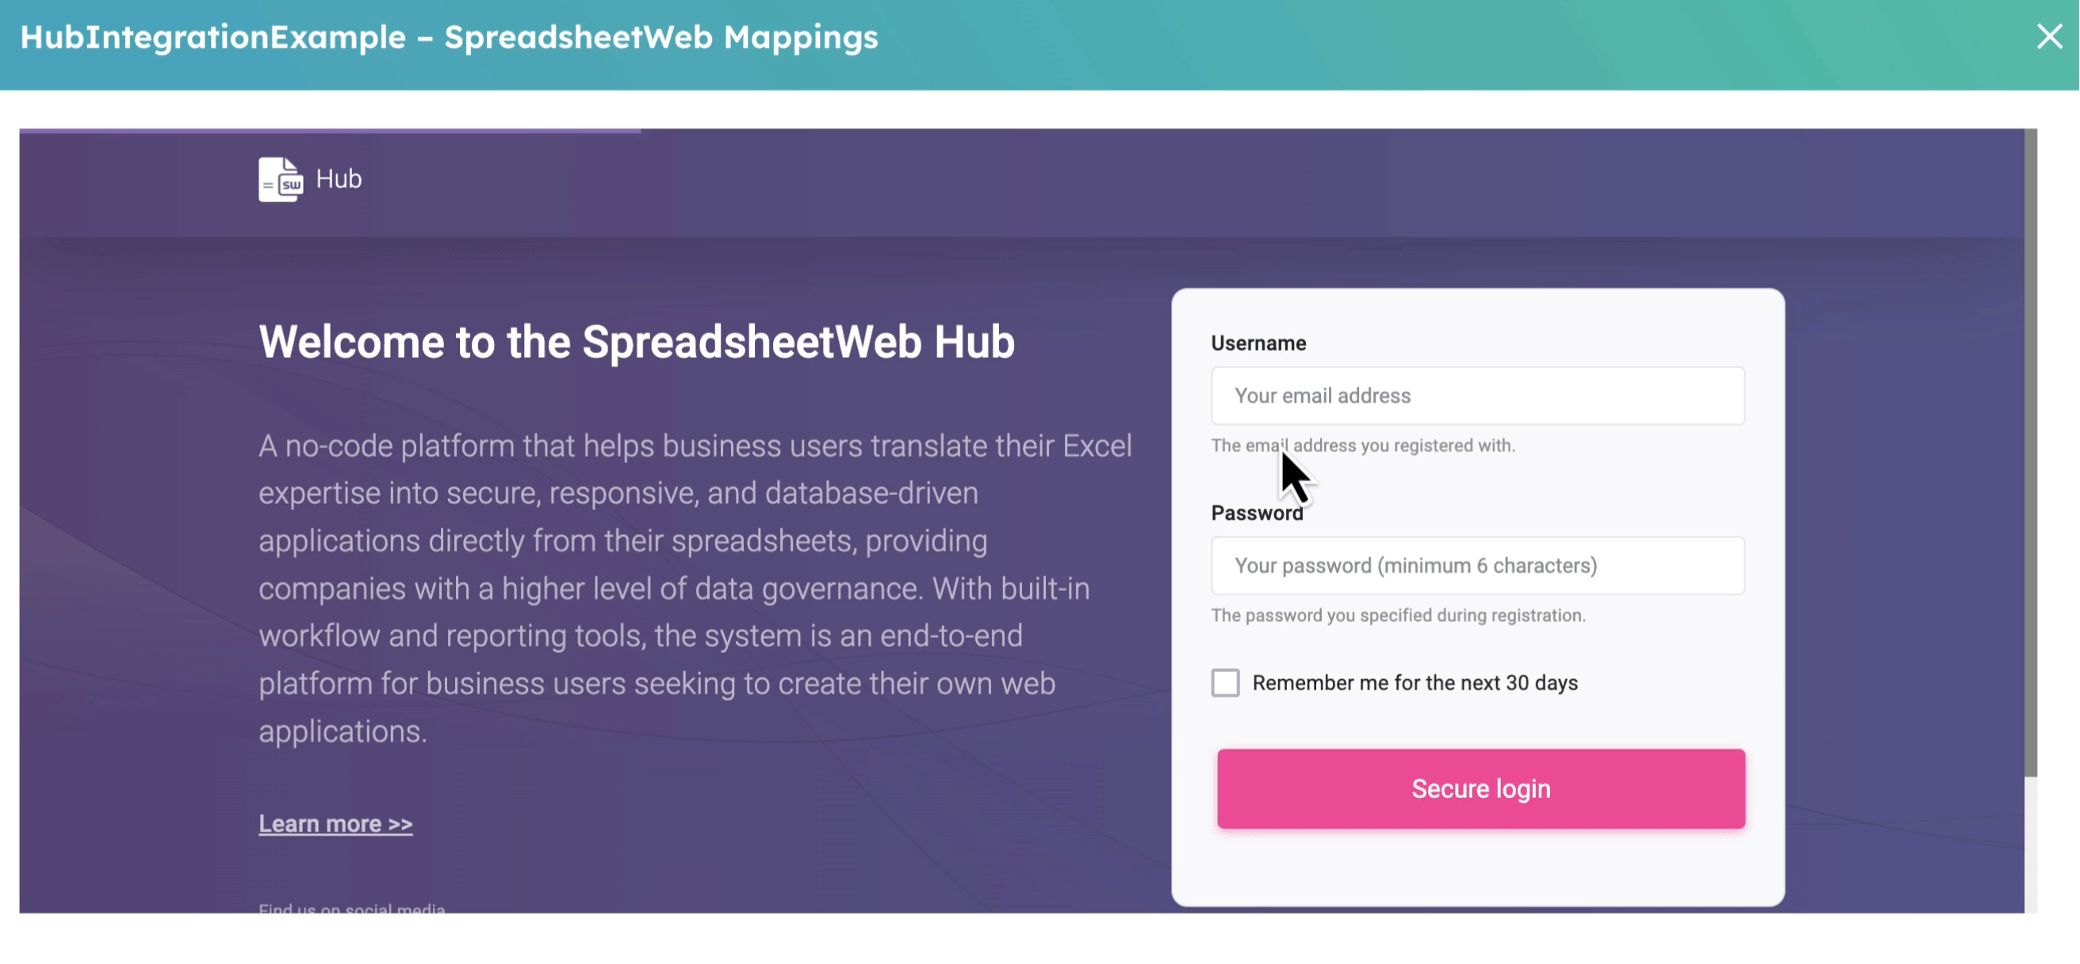
You will then be taken to the HubSpot and SpreadsheetWeb mappings page. You will be able to set here how data maps between HubSpot and SpreadsheetWeb.

Then, click CRM Objects to select the CRM objects you will want to integrate. SpreadsheetWeb currently supports the following: Contacts, Deals, and Companies. We will use Deals in this guide for illustration purposes.

Once you have selected your CRM object, click on the Columns menu in order to setup columns and data mapping. The first thing you will notice is that some of the columns have right-pointing arrows. This data in these columns flows only from HubSpot to SpreadsheetWeb and cannot be updated from SpreadsheetWeb. These are typically inputs to your SpreadsheetWeb application. The rest of the columns can be read or updated either way. Please select accordingly the named ranges or fields you need for each column.

The outputs in your SpreadsheetWeb application represent data that flows from SpreadsheetWeb to HubSpot. They are usually the formula cells in your Excel file.
Note that you may need to create custom fields in your HubSpot account matching those in your SpreadsheetWeb application. After you have set up your columns and mapped your data, click Save. Then, refresh the page to view the changes. At this stage, your CRM object you have chosen has been successfully connected to SpreadsheetWeb.

If you add more than one application to a CRM object, you need to select which application you will use every time you operate it. Do not also forget that you need to publish your SpreadsheetWeb application in order for it to be integrated into HubSpot.

Publishing Your SpreadsheetWeb Application
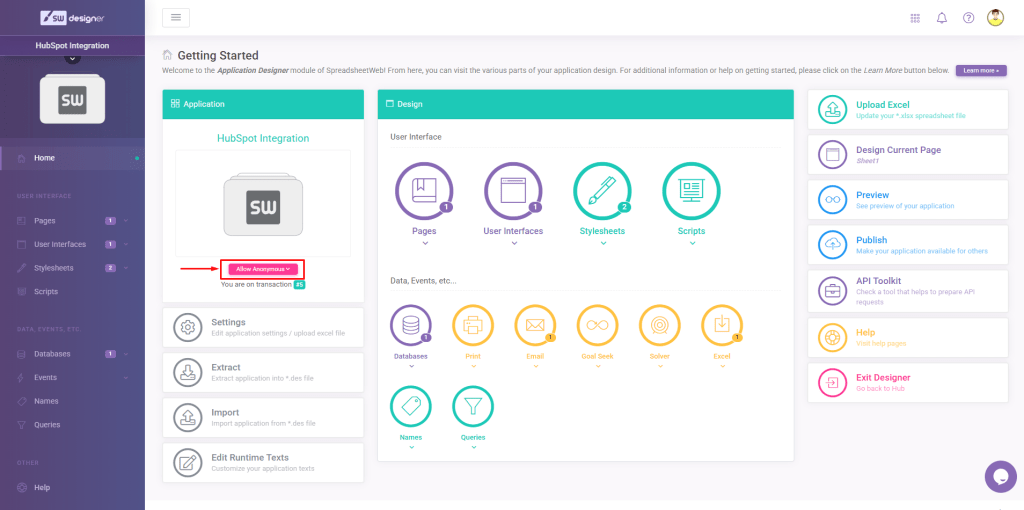
Your SpreadsheetWeb application should be public to ensure that the integration works smoothly. To this end, open the SpreadsheetWeb Hub, click on the main menu, and select Designer. Now, proceed to the Application module, open your application, and select “Allow Anonymous” to make it public. This option allows HubSpot or any other external system to use and view the application you build.
This integration will go a long way in furthering your data management across the platforms, workflow automation, and efficiency. You can refer to other customizations or troubleshooting from SpreadsheetWeb and HubSpot support resources.