Automated Application Creation
The Automated Application Creation feature in SpreadsheetWeb provides a fast and intuitive way to convert your Excel workbook into a fully functional web application. This redesigned interface lets you view your spreadsheet in its native layout and visually identify which cells, ranges, and controls should appear in the web app’s user interface. The system automatically detects potential input and output areas, while giving you full control to adjust, refine, and publish your design.
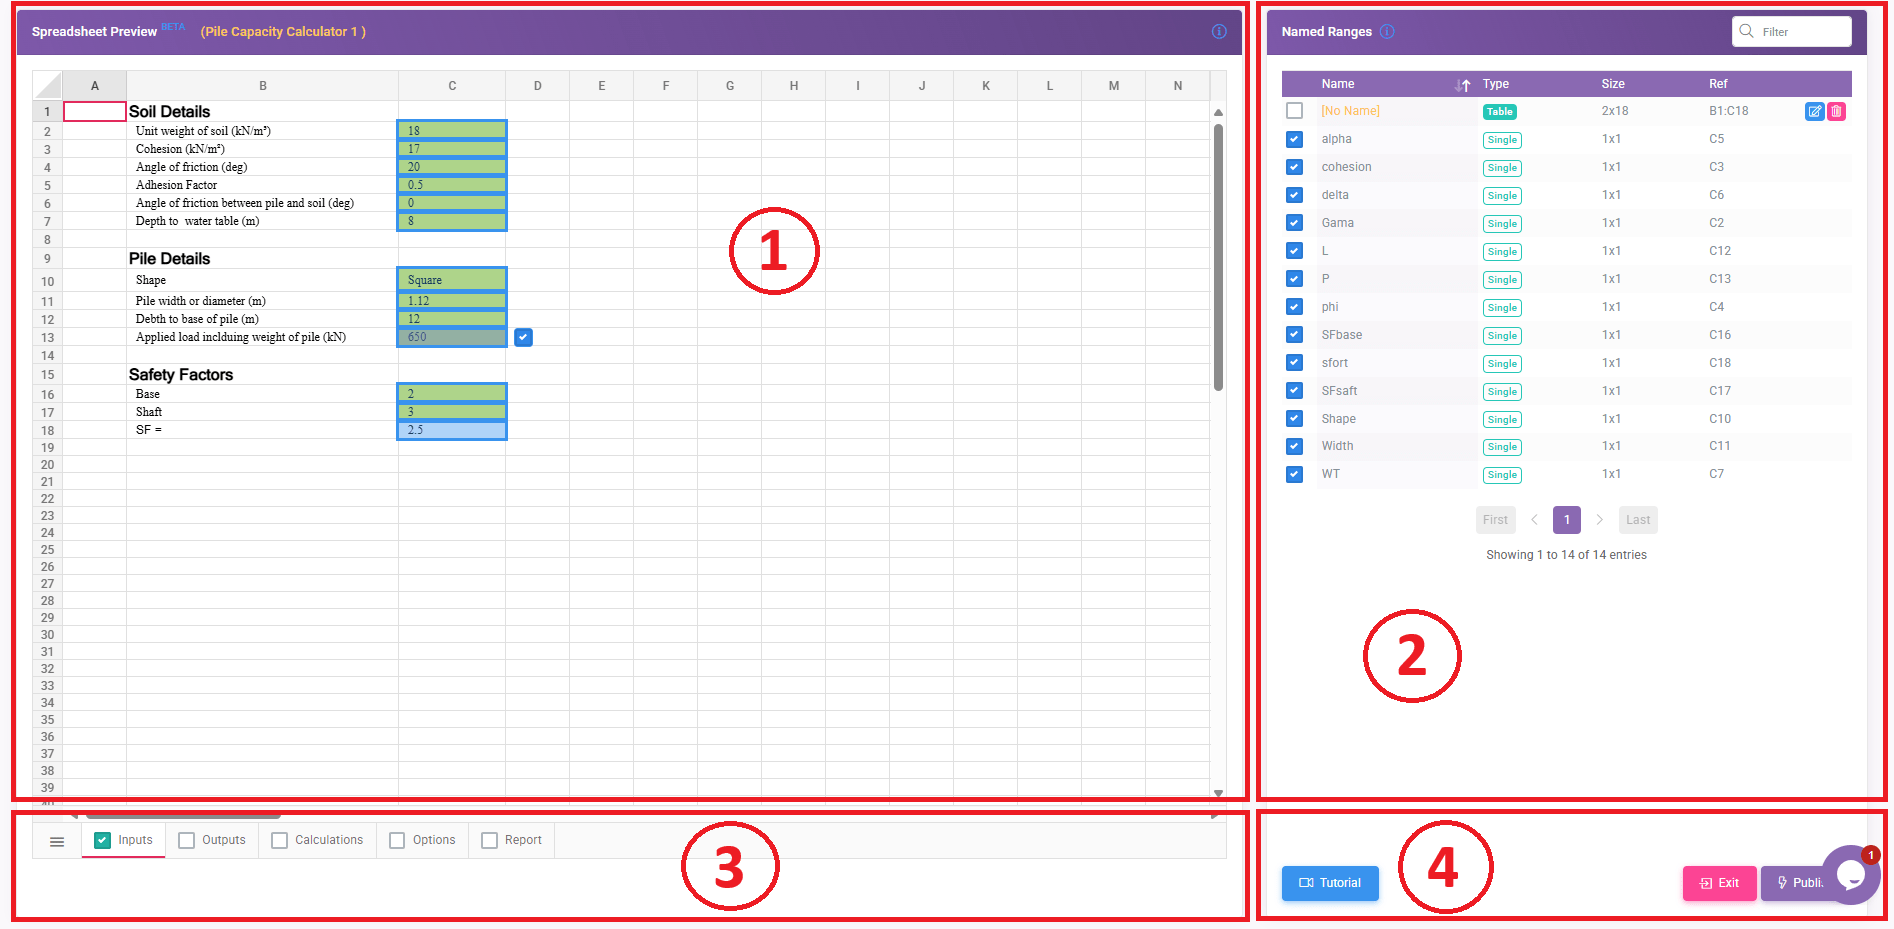
The interface consists of four main sections: Control Selections, Control Details, Worksheet Selections, and Buttons.
1. Control Selections
The Control Selections section is the starting point of the Automated Application Creation process. It displays the autodetected cells and ranges that SpreadsheetWeb identifies as potential user interface components from your uploaded Excel workbook. These detected elements are visually highlighted with borders directly on the worksheet, allowing you to see exactly which portions of your spreadsheet have been recognized as inputs, outputs, or other interactive elements.
SpreadsheetWeb automatically analyzes the structure of your Excel file, including formulas, formatting, and named ranges, to determine which cells are most likely to serve as user interface components. However, since every spreadsheet model is different, you can manually refine or extend these detections to accurately represent the layout you want in your final application.
You can interact with this section in several ways:
Add New Selections
You can select individual cells or drag across a range of cells to include them in your web application. Once a new selection is made, a checkbox will appear next to it, allowing you to quickly add it to the user interface. Checking this box includes the range in the app layout, while unchecking it removes it from display but retains its function behind the scenes.

Popup Menu for Detected Ranges
To simplify the editing process, a popup menu appears whenever you hover your mouse over a previously detected cell or range. This menu includes three icons:
- Select (Checkbox): Adds or removes the cell or range from the user interface.
- Edit: Allows you to modify the selection boundaries or adjust the range properties.
- Delete: Removes the selection entirely from the list of autodetected elements.
This visual, point-and-click interface makes it easy to adjust your app layout directly within the familiar spreadsheet view.
Note that only user-defined names can be edited or deleted. Names that were created automatically through the autodetection process cannot be modified or removed.
Remove Existing Selections
If the automated detection includes cells that you don’t want visible in the web application, simply uncheck or delete them from the popup menu or list. This ensures that only relevant input and output areas appear in the final user interface.
Visual Feedback
Each selected cell or range is outlined with a colored border. Hovering over a selection displays its details, including the cell reference or named range, so you can confirm exactly what’s being included in your design.

The purpose of the Control Selections section is to identify which parts of your Excel model should appear in the web application’s user interface. You’re not altering the underlying formulas or logic, only defining what the end user will see and interact with. All other spreadsheet cells, data, and calculations remain active and functional in the background even if they are not selected.
By finalizing your control selections here, you establish the visual and functional foundation of your application. These elements will carry over into the Control Details section, where you can review their properties, types, and names before publishing.
2. Control Details
In the Control Details section, all detected and manually added controls are listed with their associated properties such as name, type, size, and references. Controls that are enabled for inclusion in the final application are indicated with a checkmark. Only those items that are selected (checked) will be included in the published web app.
This panel helps you review and refine which elements from your workbook will be made interactive, ensuring consistency between your Excel logic and the web interface.
3. Worksheet Selections
The Worksheet Selections section mirrors the structure of your Excel workbook, allowing you to manage which worksheets become pages (or tabs) in your web application. By default, each worksheet will generate one application page. However, you must visit each worksheet and enable the specific cells or ranges to be included in the user interface.
Remember that not all spreadsheet data needs to appear in the web app, internal formulas, data tables, or reference cells can remain hidden. Even if they are not selected for display, all underlying formulas and data will continue to function correctly within the application.
4. Buttons
The Buttons section provides the main action controls for completing or exiting the automated creation process:
-
Publish: Generates and publishes the final web application based on your selected elements.
-
Exit: Closes the interface without publishing changes.
-
Tutorial: Opens an interactive guide explaining how to use the Automated Application Creation system step-by-step.
These tools streamline the process, allowing you to quickly review, adjust, and finalize your application design from a single interface.